


How to Use Bearer Tokens for API Authentication

Ronak Kadhi
June 10, 2026
8MIN READ
Your lightweight Client for API debugging
No Login Required
Get Requestly
Requestly Works on Desktop Only
Requestly isn’t available for download on mobile or tablets.
To download it, please open this page on a desktop PC and enter your email to get the link.



Mac app
Lightweight & Privacy-first API Client
- Local Projects
- Organize API into Collections & Environments
- API Tests
- Import from Postman, OpenAPI, etc
Download Now


Chrome extension
Intercept & modify HTTP requests/responses
- Redirect URLs & modify HTTP headers
- Mock API / GraphQL responses
- Insert custom JavaScript scripts
Add To Chrome
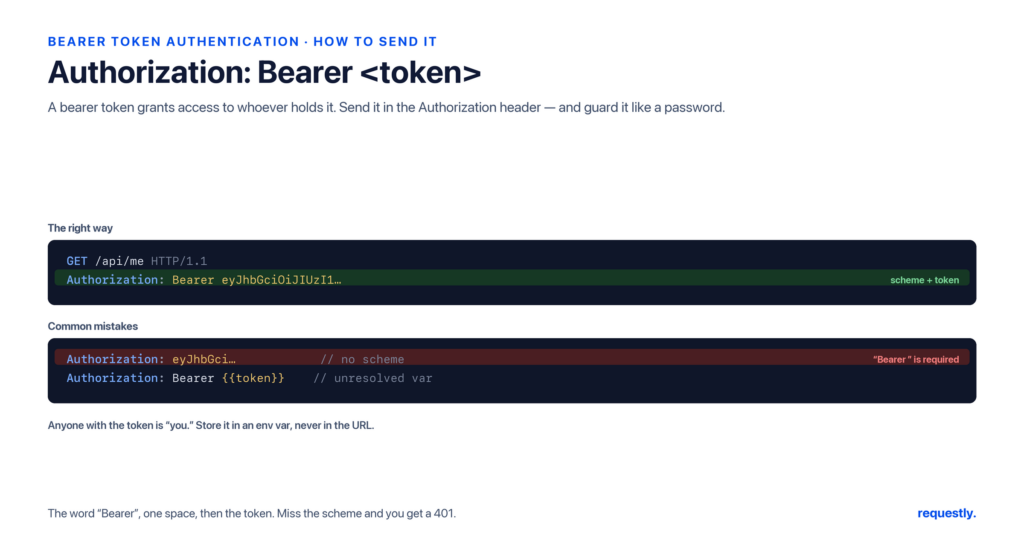
Bearer token authentication is the default for modern HTTP APIs. You log in, the server hands back a token, and you attach that token to every subsequent request as Authorization: Bearer <token>. The hard part is rarely the syntax — it is the lifecycle: grabbing the token without copy-pasting it by hand, reusing it across a dozen requests, and refreshing it before it expires and floods you with 401s.
This guide walks through it end to end: what “Bearer” actually means, how to set up Bearer auth on a request, how to capture a token automatically with a post-response script and store it in an environment variable, and how to reuse it across an entire collection — all in the Requestly API client. If you have used a “Bearer Token” auth type in Postman, the same workflow maps over directly. This post is part of our wider guide to API authentication methods.
What “Bearer” means
A Bearer token (RFC 6750) is a credential you present in the Authorization header with the Bearer scheme:
GET /v1/me HTTP/1.1
Host: api.example.com
Authorization: Bearer eyJhbGciOiJIUzI1NiIsInR5cCI6IkpXVCJ9...
The word “bearer” is the whole security model: whoever bears (holds) the token can use it. The server does not check that you are the rightful owner — possession is sufficient. That makes a Bearer token exactly as sensitive as a password, with two implications: always transmit it over HTTPS, and never paste it anywhere it might be logged or shared.
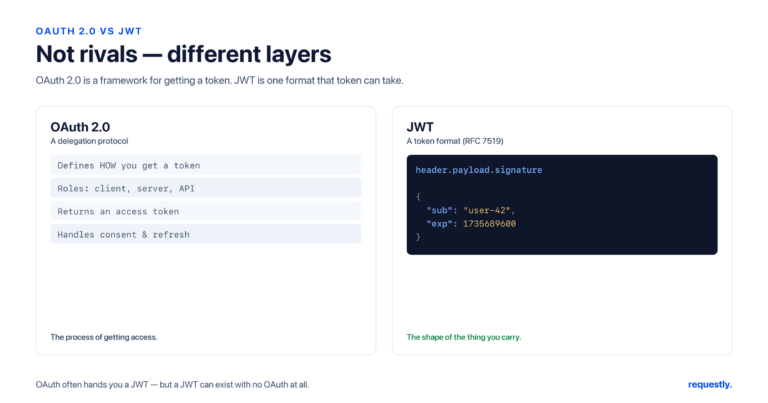
Bearer is a transport scheme, not a way to obtain a credential. The token itself is issued elsewhere — by a login endpoint, or by an OAuth 2.0 flow (see OAuth 2.0 Flows Explained). The token may be an opaque random string or a self-contained JWT; from the client’s side you treat it identically. (On that distinction, see OAuth vs JWT.)
Step 1: Set Bearer auth on a request
The naive approach is to add an Authorization header by hand. Don’t — use the dedicated auth type so the tool formats it correctly and you avoid the classic mistakes (forgetting the Bearer prefix, or adding a stray space). In Requestly:
- Open the request and select the Authorization tab.
- Choose Bearer Token as the type.
- Enter the token value — or, better, a variable reference like
{{accessToken}}.
Requestly adds Authorization: Bearer <value> for you. Pasting a raw token here works for a one-off test, but for anything you save, reference a variable instead so the secret is not baked into the request.
Step 2: Capture the token automatically
Manually copying a token out of a login response and pasting it into every other request is the part everyone hates — and the token expires, so you do it again and again. Automate it with a post-response script on the login request that reads the response body and writes the token into an environment variable.
One important constraint to understand: a Requestly script operates on the response of the request it is attached to. It cannot make its own HTTP call — there is no fetch and no async/await inside a script. So the capture script lives on the login request itself, and runs the moment that request returns:
// Post-response script on the login / token request.
// Change "access_token" to match your API's response body.
const data = rq.response.json();
rq.environment.set("accessToken", data.access_token);

rq.test("Login succeeded", function () {
  rq.expect(rq.response.code).to.equal(200);
  rq.expect(data.access_token).to.be.a("string");
});
Adjust the field name to your API’s shape. If the login response looks like { "data": { "token": "..." } }, read data.data.token; if it is { "id_token": "..." }, read data.id_token. The helpers worth knowing: rq.response.json() parses the body, rq.response.text() gives the raw string, and rq.response.code is the status code. Once this runs, the token is stored and ready for every other request.
Capture once, reuse everywhere: A post-response script on your login request writes the token to an environment variable so the rest of your collection just works — no copy-paste, no stale tokens. Explore the API client →
Step 3: Reuse the token across a collection
With the token in an environment variable, every other request references it instead of carrying its own copy. The cleanest way to do that is to set the auth once at the collection level and let each request inherit it.
In Requestly you can set Bearer Token auth on the collection, with the value {{accessToken}}. Each request inside the collection inherits that configuration by default, so you configure auth in exactly one place. Add a request, and it is already authenticated.
# Collection-level Authorization, inherited by every request
Authorization: Bearer {{accessToken}}
Variables come in multiple scopes — environment, collection, global, and runtime — so you can keep separate tokens for staging and production and switch between them by changing the active environment. The token your capture script wrote in Step 2 is immediately visible to every inheriting request.
Step 4: Catch expiry before it bites
Bearer tokens are short-lived by design — that is what limits the damage if one leaks — so the failure you will hit most is an expired token returning 401. Make that loud instead of letting it cascade into confusing downstream errors. Add a small assertion to your requests (or to the collection’s post-response script) that flags an unauthorized response immediately:
rq.test("Token is still valid", function () {
  rq.expect(rq.response.code).to.not.equal(401);
});
When that test fails, the fix is to re-run the login request — its capture script writes a fresh token, and because everything references {{accessToken}}, the whole collection picks it up with no further edits. If your API uses refresh tokens, send the refresh request the same way and capture the new access token from its response:
// Post-response script on the refresh request
const data = rq.response.json();
rq.environment.set("accessToken", data.access_token);
if (data.refresh_token) {
  rq.environment.set("refreshToken", data.refresh_token);
}
Step 5: Keep production tokens in the Vault
Environment variables are fine for tokens you generate while testing. For a token that unlocks production data, use Requestly’s built-in Vault, which stores secrets securely and integrates with AWS Secrets Manager. Reference a Vault secret exactly as you would a variable, and the raw token never appears in a saved request or a shared workspace.
Because Requestly is local-first, captured tokens and Vault secrets stay on your machine rather than syncing to a vendor cloud — which is the behavior you want when the token in question is a live production credential.
Common Bearer token mistakes
- Hardcoding the token in every request. It expires, and now you are editing a dozen requests. Use a variable and collection-level inheritance.
- Forgetting the scheme. The header is
Authorization: Bearer <token>, not just the token. The Bearer Token auth type adds the prefix so you cannot get it wrong. - Reading the wrong field. Login responses vary —
access_token,token,id_token, or nested underdata. Inspect the response and match the field exactly. - Treating a token like a permanent key. It is short-lived on purpose; build refresh in, do not fight it.
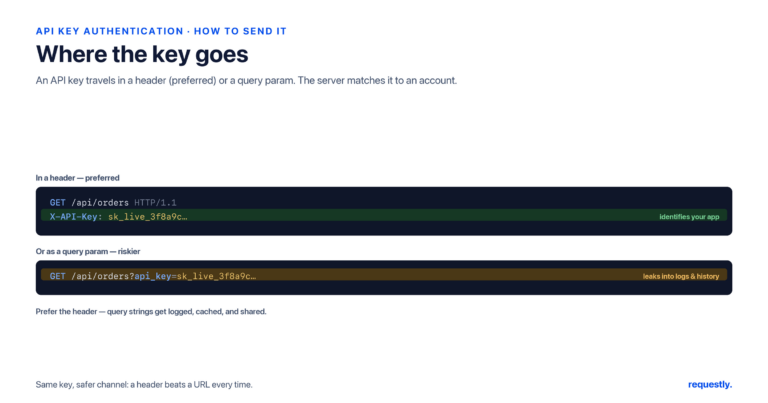
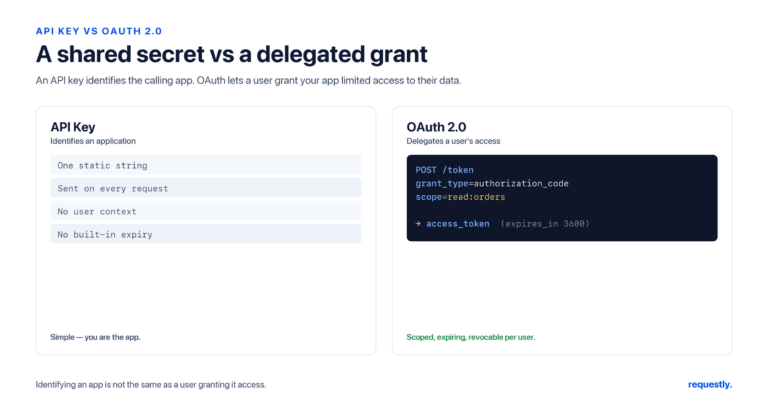
If you are still deciding whether a token is even the right approach versus a static key, API Key vs OAuth lays out the trade-offs, and the full menu of schemes is in API authentication methods.
Stop hand-managing tokens: Capture on login, inherit across the collection, refresh on expiry, and keep secrets in the Vault — one workflow in Requestly. Explore the API client →
Frequently asked questions
What is a Bearer token?
A Bearer token is a credential presented in the Authorization header using the Bearer scheme, as in Authorization: Bearer followed by the token. The name means possession is sufficient: whoever holds the token can use it, so it must be sent only over HTTPS and treated as sensitively as a password. The token may be an opaque string or a JWT.
How do I add a Bearer token in Requestly?
Open the request, go to the Authorization tab, and choose Bearer Token. Enter the token value or, preferably, a variable reference such as the accessToken variable. Requestly adds the Authorization: Bearer header for you, so you avoid mistakes like omitting the Bearer prefix or adding a stray space.
How do I capture a token automatically after login?
Add a post-response script to the login request that reads the body and stores the token. For example, parse the response with rq.response.json() and call rq.environment.set with the token field. The script runs on the login request itself, since Requestly scripts read the response they are attached to and cannot make their own HTTP calls.
How do I reuse one token across many requests?
Store the token in an environment variable and set Bearer Token auth at the collection level with that variable as the value. Every request in the collection inherits the configuration, so you define auth once. When the login script updates the variable, all inheriting requests use the new token automatically.
What happens when a Bearer token expires?
An expired token returns a 401 Unauthorized. Add an assertion such as rq.expect(rq.response.code).to.not.equal(401) so expiry surfaces clearly. To recover, re-run the login request, which captures a fresh token into the same variable, or send a refresh request and capture the new access token from its response.
Where should I store a production Bearer token?
Use Requestly’s Vault, which stores secrets securely and integrates with AWS Secrets Manager, rather than pasting the token into a request or a plain environment variable. Reference the Vault secret like a variable so the raw token never appears in a saved request. Because Requestly is local-first, the secret stays on your machine.
Written by
Ronak Kadhi
Contents
- What "Bearer" means
- Step 1: Set Bearer auth on a request
- Step 2: Capture the token automatically
- Step 3: Reuse the token across a collection
- Step 4: Catch expiry before it bites
- Step 5: Keep production tokens in the Vault
- Common Bearer token mistakes
- Frequently asked questions
- What is a Bearer token?
- How do I add a Bearer token in Requestly?
- How do I capture a token automatically after login?
- How do I reuse one token across many requests?
- What happens when a Bearer token expires?
- Where should I store a production Bearer token?
Subscribe for latest updates
[sibwp_form id=1]
Share this article
Get started today
Join 300,000+ developers building smarter workflows.
Get Started for Free
Requestly Works on Desktop Only
Requestly isn’t available for download on mobile or tablets.
To download it, please open this page on a desktop PC and enter your email to get the link.
Mac app
Lightweight & Privacy-first API Client
- Local Projects
- Organize API into Collections & Environments
- API Tests
- Import from Postman, OpenAPI, etc
Download Now
Chrome extension
Intercept & modify HTTP requests/responses
- Redirect URLs & modify HTTP headers
- Mock API / GraphQL responses
- Insert custom JavaScript scripts
Add To Chrome