A Beginner’s Guide to Testing GraphQL APIs with Requestly

When working with APIs, most developers are used to REST. But GraphQL is quickly becoming the go-to choice for modern applications. Instead of juggling multiple endpoints, GraphQL lets you work with a single endpoint (usually /graphql) and define exactly what data you need. This means fewer round trips, less over-fetching, and more control for the client.
The good news? With the Requestly API Client, running GraphQL queries is just as easy as sending REST requests. In this guide, we’ll walk through creating your first GraphQL request step by step.
Step 1: Create a New GraphQL Request
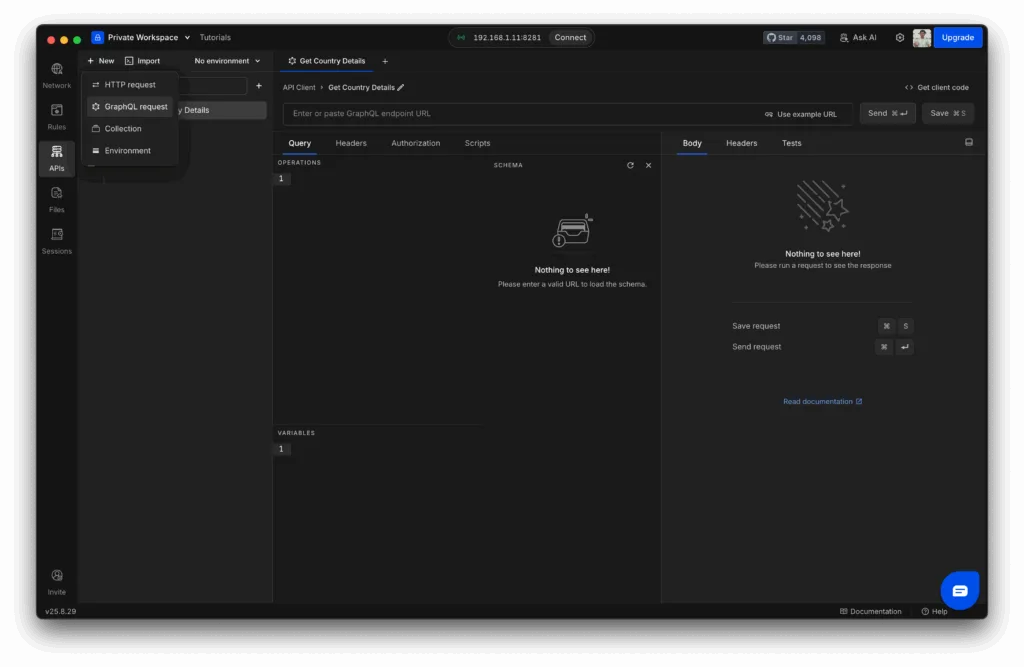
- Open the API Client from the left sidebar in Requestly.
- Click + New and select GraphQL Request.
- Give your request a descriptive name, like “Get Country Details.”
Step 2: Enter a GraphQL Endpoint
For this tutorial, we’ll use the Countries API (a free, public GraphQL server):
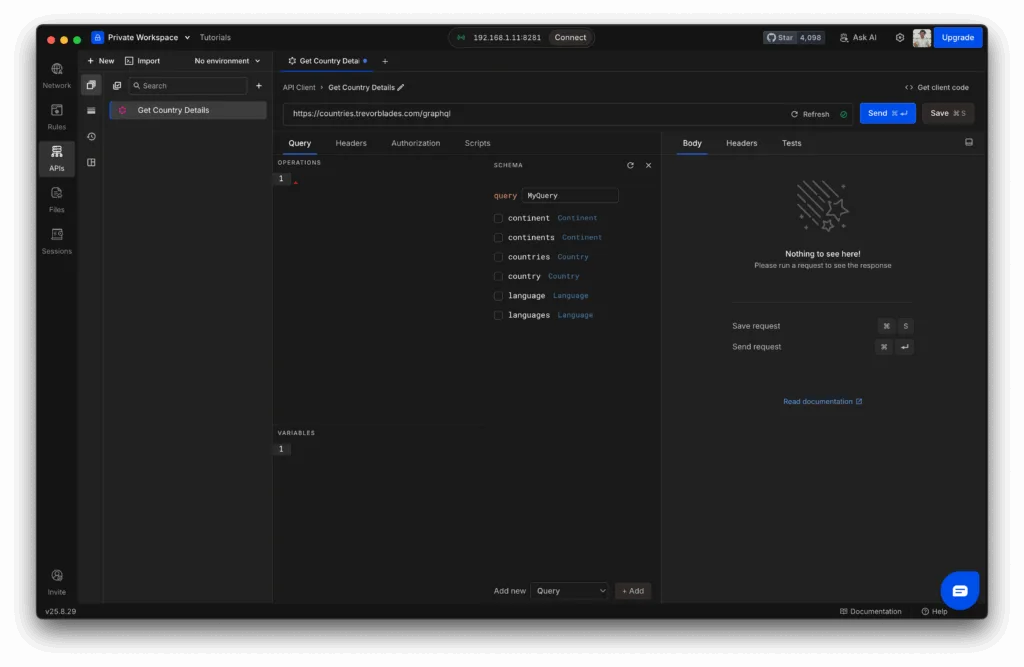
https://countries.trevorblades.com/graphqlPaste this into the URL field.
Once added, Requestly will automatically introspect the schema so you can explore available queries, mutations, and types.
Step 3: Explore the Schema
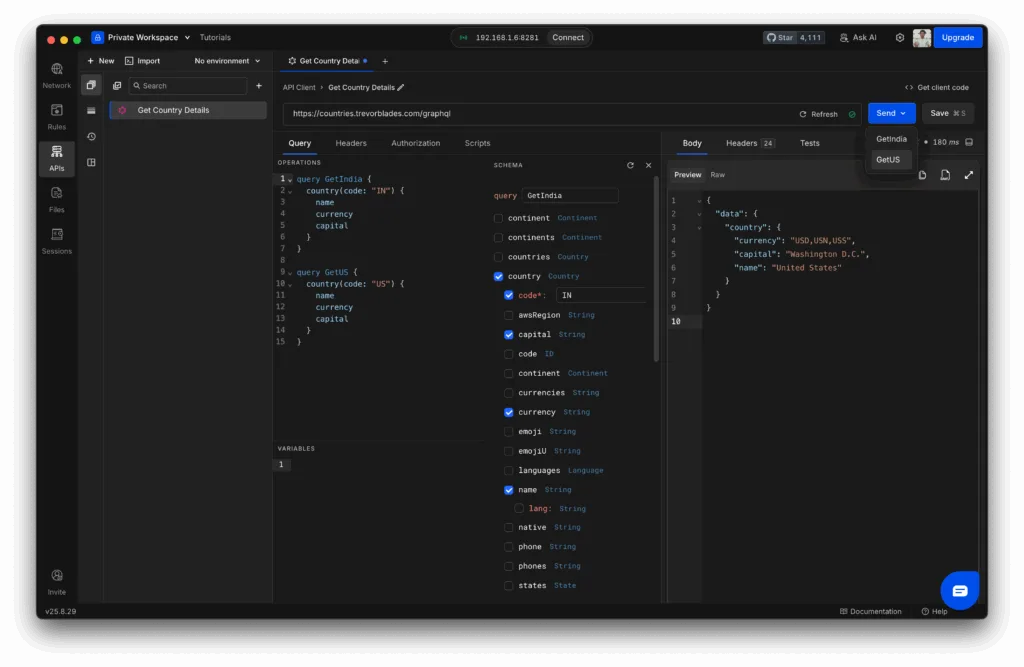
In request, you’ll should see three panels:
- Query Editor → where you write your GraphQL queries or mutations.
- Variables Editor → where you define variables in JSON format.
- Schema Explorer → a browsable tree of queries, mutations, and fields exposed by the API.
This setup makes it easy to discover what data you can fetch without memorizing the schema.
Step 4: Build Your First Query
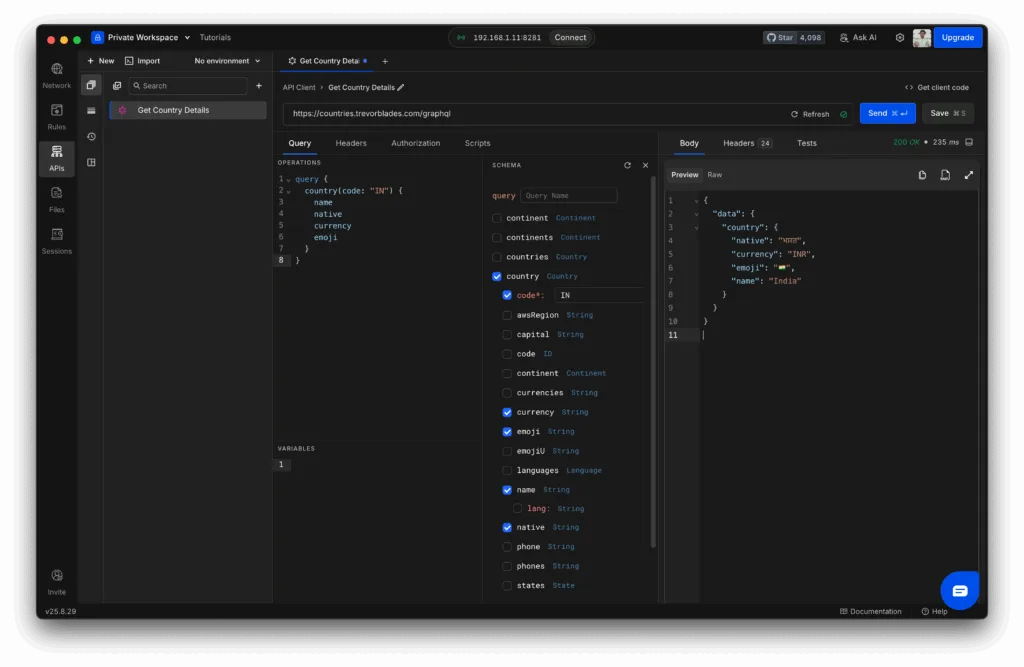
Let’s fetch some details about India. In the Query Editor, enter:
query {
  country(code: "IN") {
    name
    native
    currency
    emoji
  }
}
Click Send.
You’ll see a JSON response with the country’s name, currency, and emoji. 🎉
Step 5: Add Variables (Optional)
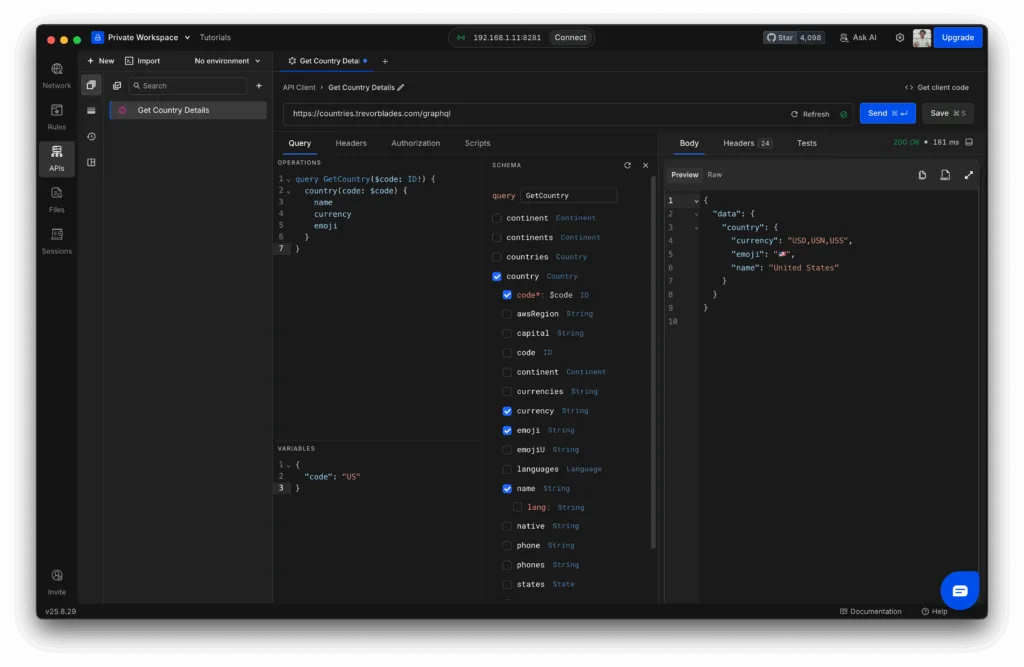
Instead of hardcoding values, you can use variables to make requests reusable.
Query:
query GetCountry($code: ID!) {
  country(code: $code) {
    name
    currency
    emoji
  }
}
Variables:
{
  "code": "US"
}
Now you can quickly swap between different countries just by changing the variable value.
Step 6: Run Multiple Queries
You can also define multiple queries in the same request. For example:
query GetIndia {
  country(code: "IN") {
    name
    currency
    capital
  }
}

query GetUS {
  country(code: "US") {
    name
    currency
    capital
  }
}
When you hit Send, Requestly will let you pick which query to execute from a dropdown. This makes it easy to test variations side by side without creating separate requests.
Wrapping Up
That’s it — you just ran your first GraphQL request in Requestly!
With schema exploration, variables, and support for multiple queries, the Requestly API Client makes debugging and testing GraphQL APIs as seamless as REST.
Next steps to try:
- Run a mutation (e.g., updating or creating data).
- Test a GraphQL API that requires authentication headers.
- Chain GraphQL requests together using runtime variables in Requestly.
Whether you’re new to GraphQL or already building production APIs, Requestly gives you the flexibility to test faster and collaborate better.
Contents
Subscribe for latest updates
Share this article
Related posts


