Debug Network Requests in Flutter Using Requestly

Introduction
When working with Flutter apps, debugging network requests can be challenging because Flutter doesn’t work with system-level proxy settings. Unlike other platforms where you can configure a proxy at the OS level if you’re using Requestly you might not see any traffic from your Flutter app by default. However, there is a workaround for this by manually configuring Flutter’s HTTP client.
In this post, I’ll show you how to configure your Flutter app to work with Requestly, allowing you to efficiently intercept and debug network requests in flutter.
Why Flutter doesn’t work with system-level proxy ?
Flutter doesn’t work with system-level proxy settings because it uses its own networking stack, which operates independently of the operating system’s network configurations. Unlike many native applications, which rely on the OS to handle network requests and thus inherit the OS-level proxy settings, Flutter’s networking is built using Dart’s own HTTP libraries ( HttpClient). These libraries don’t automatically pick up or use the proxy settings that are configured at the system level.
How to solve this in Requestly !
In Requestly, you need to manually set up a proxy within your Flutter app. By doing this, you can intercept all HTTP / HTTPS requests through Requestly, allowing you to capture, modify, and mock API requests and responses.
Below is a step-by-step guide to configuring your Flutter app to use Requestly.
1. Download certificate
Open the Requestly Desktop app.
Click on Connect Apps, then select Other.
Click on Setup Instructions for Manual Setup.
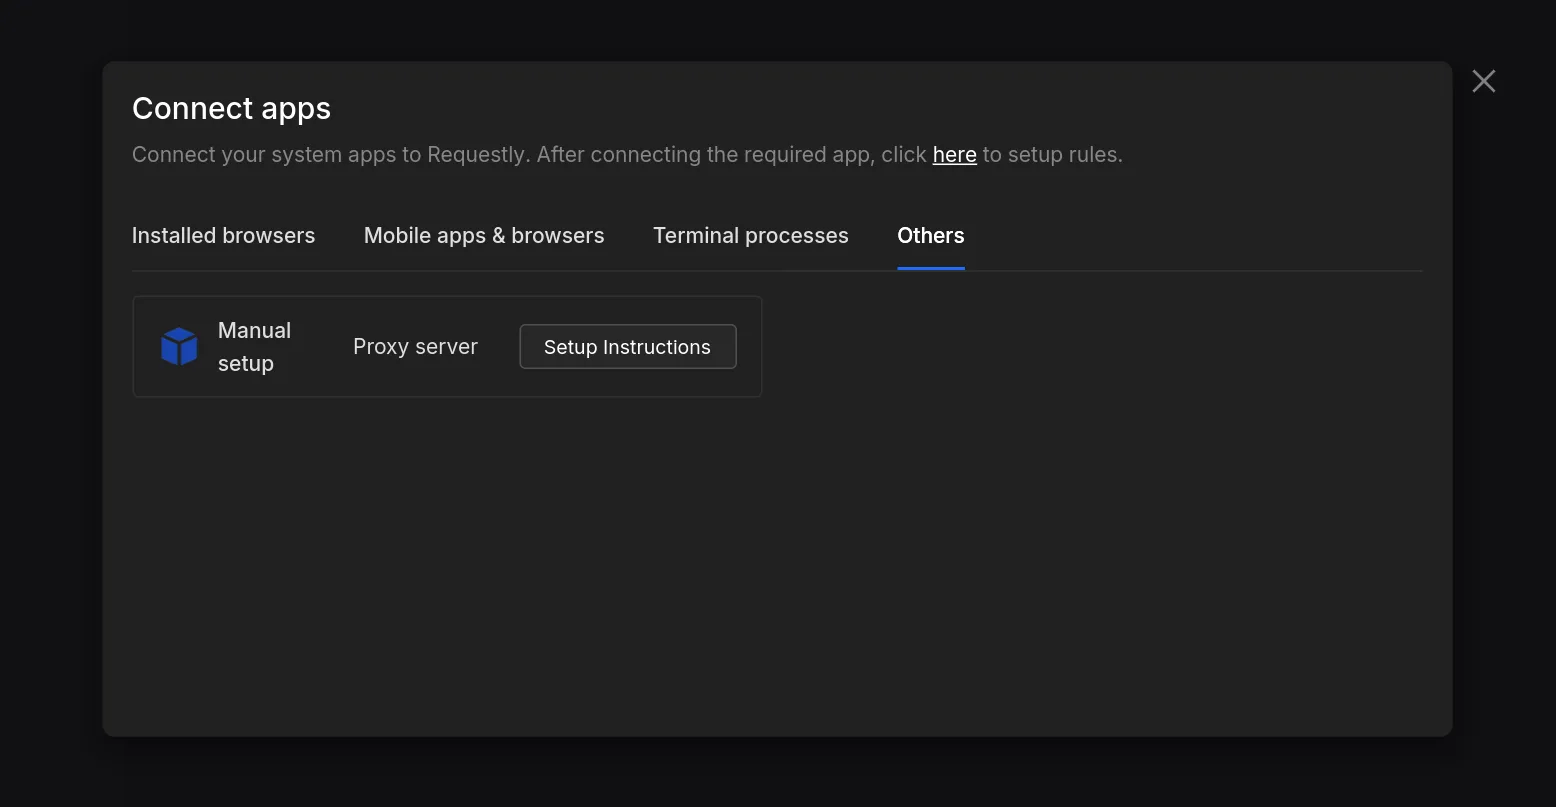
Finally, click on
Save Certificateto download theRQProxyCA.pem.cert.
2. Trust Certificate
- Open Trusted Certificate Settings by navigating to
Settings -> Security -> Encryption & Credentials -> Install a Certificate -> CA Certificate. - To install this certificate, select
Install Anywayand select the certificateRQProxyCA.pem.cert. - To verify Certificate trust settings are now active, go to
Trusted Credentials -> User.RQProxyCAshould be present here. Alternately, you may simply begin submitting requests and watch as they are logged in the Requestly Network Tab.

3. Set Up the Proxy in Your Flutter App
Flutter offers several HTTP clients, so we’ll walk through the setup process for some of the most common and popular ones, such as Native HttpClient, Dio and http.
The steps to configure a proxy for each may vary slightly.
					// Create a new HttpClient instance.
HttpClient httpClient = new HttpClient();

// Set the proxy for the HTTP client.
httpClient.findProxy = (uri) {
  return "PROXY <YOUR_LOCAL_IP>:<PORT>";
};

// Allow Requestly to receive SSL payloads on Android.
httpClient.badCertificateCallback =
  ((X509Certificate cert, String host, int port) => Platform.isAndroid);
					// Create a new Dio instance.
Dio dio = Dio();

// Configure the proxy within the onHttpClientCreate callback.
(dio.httpClientAdapter as DefaultHttpClientAdapter).onHttpClientCreate = (client) {
  // Set the proxy for the HTTP client.
  client.findProxy = (url) {
    return 'PROXY <YOUR_LOCAL_IP>:<PORT>';
  };

  // Allow Requestly to receive SSL payloads on Android.
  client.badCertificateCallback = (X509Certificate cert, String host, int port) => Platform.isAndroid;
};
					// Create a new HttpClient instance.
HttpClient httpClient = new HttpClient();

// Set the proxy for the HTTP client.
httpClient.findProxy = (uri) {
  return "PROXY <YOUR_LOCAL_IP>:<PORT>";
};

// Allow Requestly to receive SSL payloads on Android.
httpClient.badCertificateCallback =
  ((X509Certificate cert, String host, int port) => Platform.isAndroid);

// Pass the newly created HttpClient to the http.IOClient.
IOClient myClient = IOClient(httpClient);
Replace <YOUR_LOCAL_IP> and <PORT> with your computer’s Local IP and Port, which you can find in the Requestly Desktop app.
4. [if-required] SSL Pinning
Add these configs to your app codebase for it to work
- Add res/xml/network_security_config.xml
					<network-security-config>
  <debug-overrides>
    <trust-anchors>
      <certificates src="user" />
      <certificates src="system" />
    </trust-anchors>
  </debug-overrides>

  <base-config cleartextTrafficPermitted="true">
    <trust-anchors>
      <certificates src="system" />
      <certificates src="user" />
    </trust-anchors>
  </base-config>
</network-security-config>
- Add to AndroidManifest.xml
					<?xml version="1.0" encoding="utf-8"?>
<manifest ... >
    <application android:networkSecurityConfig="@xml/network_security_config" ... >
    ...
    </application>
</manifest>
Contents
Subscribe for latest updates
Share this article
Related posts


