How to Intercept network on iOS simulator?

Introduction
Debugging network requests in the iOS simulator can be challenging, especially when it comes to setting up the simulator, enabling a proxy, and configuring SSL to capture traffic. If you’re using Requestly, you may not see network traffic from your app by default due to these extra setup steps.
In this post, I’ll walk you through how to configure Requestly to intercept and debug HTTP traffic from the iOS simulator. With the right setup, you’ll be able to easily monitor, modify, and test network requests, making your development process smoother and more efficient.
Setup Simulator
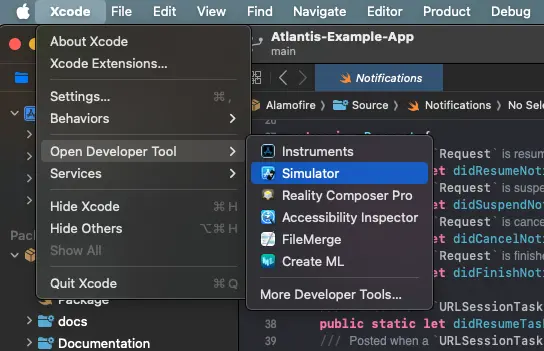
Open or Create a Project: Begin by creating a new project or opening an existing one. Once inside the project, navigate to Open Developer Tool > Simulator.
Simulator Window: You will now see a list of simulators installed on your system. If you don’t see any, click the + button at the bottom left to add a new simulator.
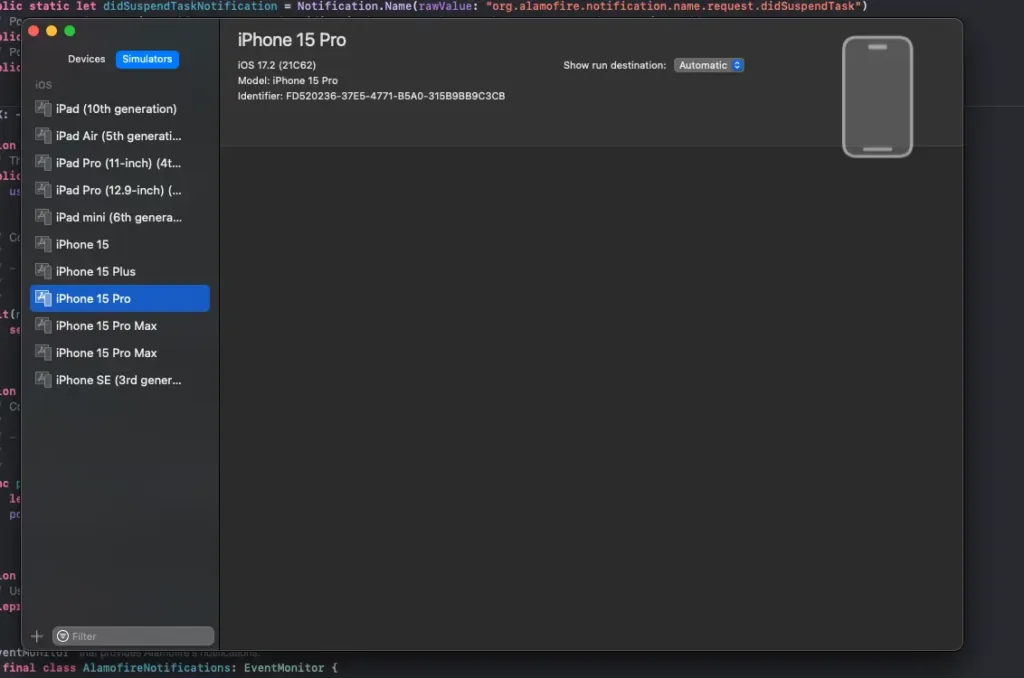
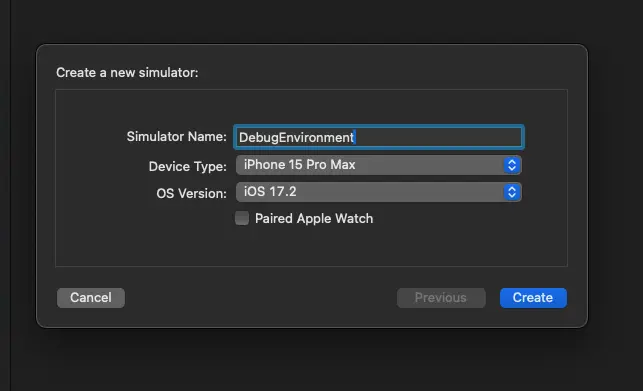
Configure Simulator: A popup window will appear, allowing you to select the type of device, OS version, and give it a name. After setting the desired configuration, click Create.
Run the Project: Once your simulator is ready, go to Project > Run to launch your app inside the simulator.
This will load your iOS app in the selected simulator, providing a fully functional testing environment.
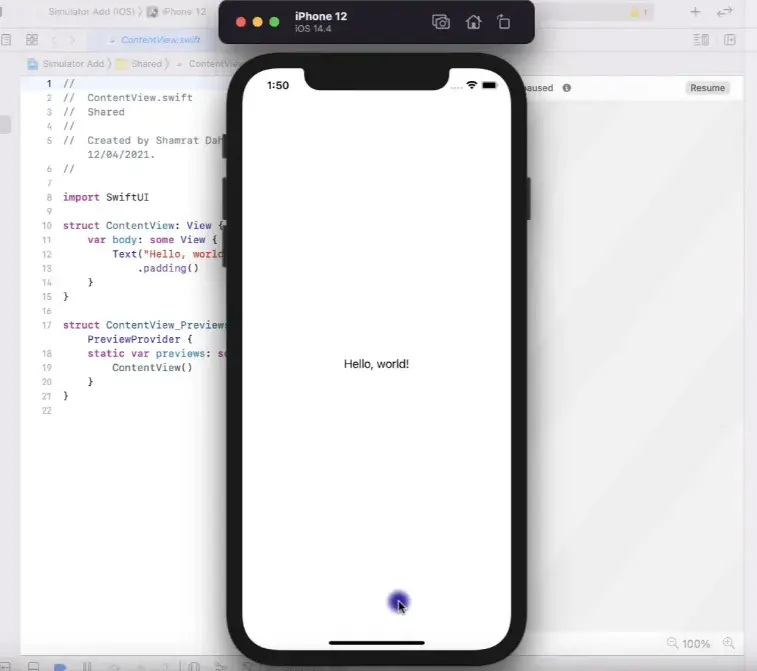
Now that your ios emulator is up and running let’s setup requestly proxy.
Setup Requestly proxy
Requestly allows you to simulate network conditions by intercepting API requests and responses, enabling you to test various scenarios directly within your iOS emulator.
- First, head over to Requestly and download and install the desktop app on your system.
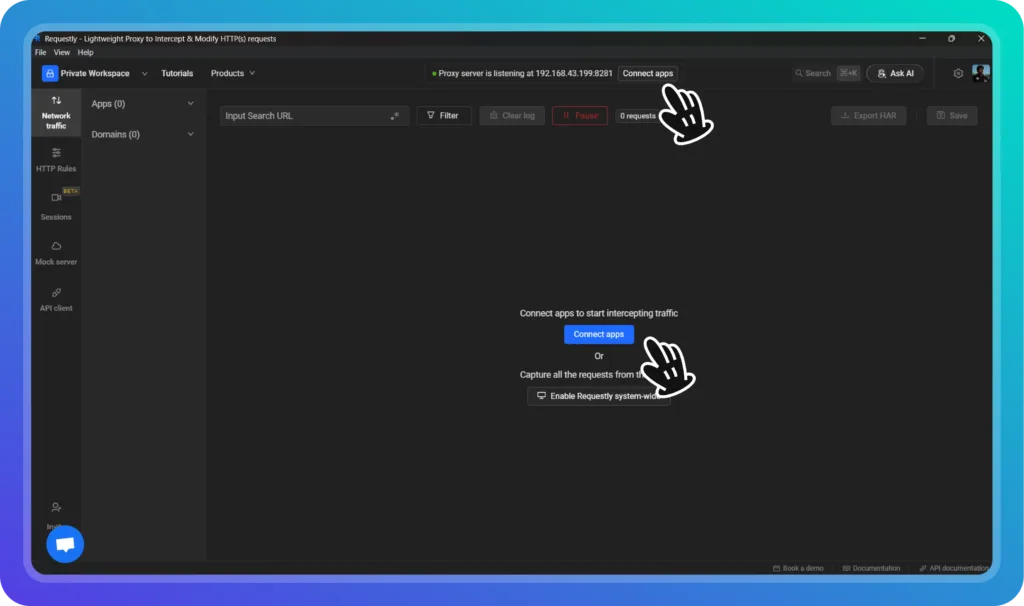
- Once installed, open the Requestly desktop app and click on Connect apps.
- In the Connect Apps section, choose the option labeled Mobile Apps and Browsers.
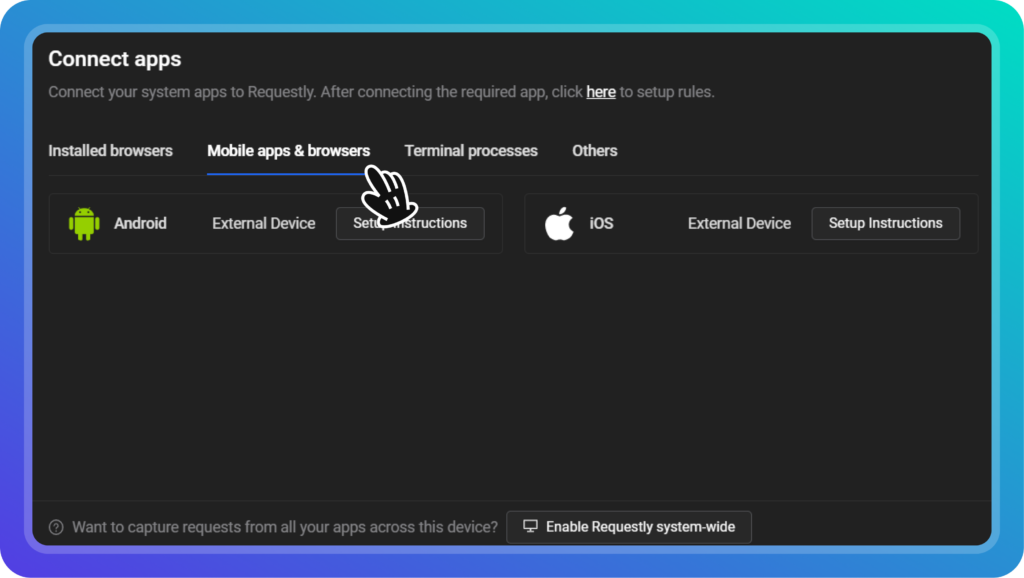
- Next, click on iOS External Device and select Setup Instructions.
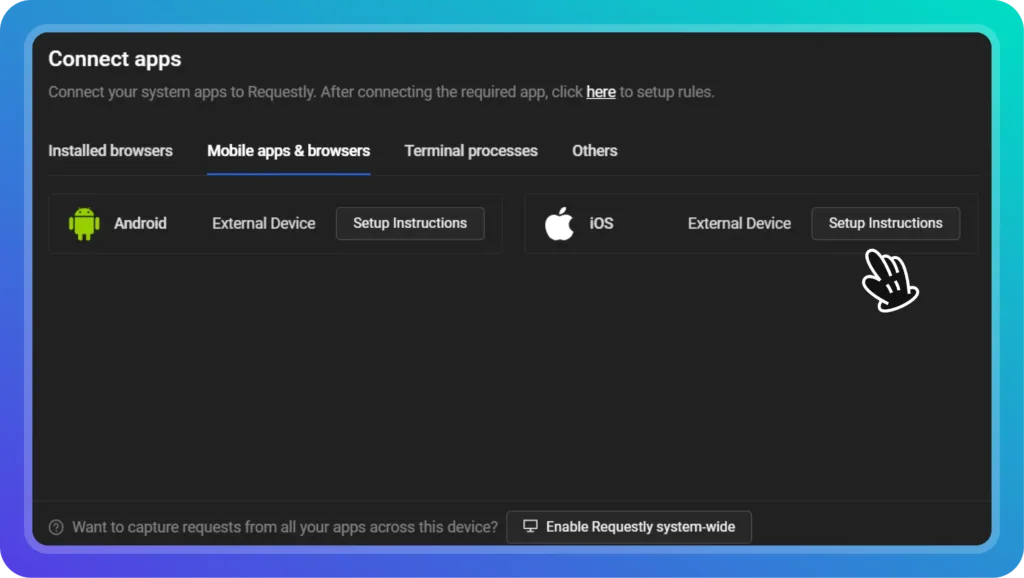
Requestly will now display detailed instructions on how to set up the proxy on your iOS device or emulator. Follow these steps carefully to configure the proxy settings and enable network traffic interception on your emulator.
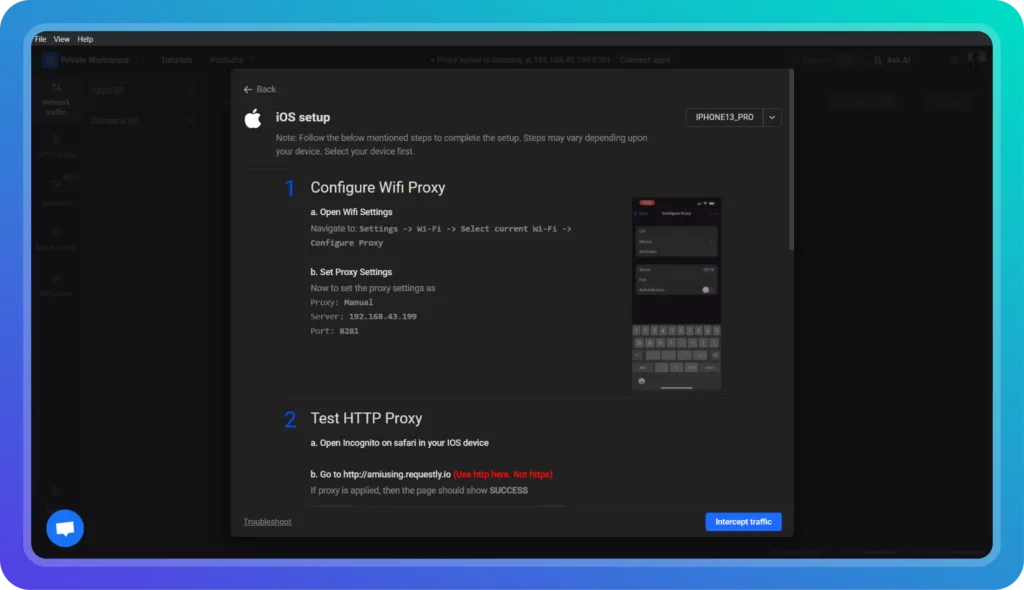
Let’s follow these instructions to setup a proxy on our iPhone emulator
Setup the Proxy
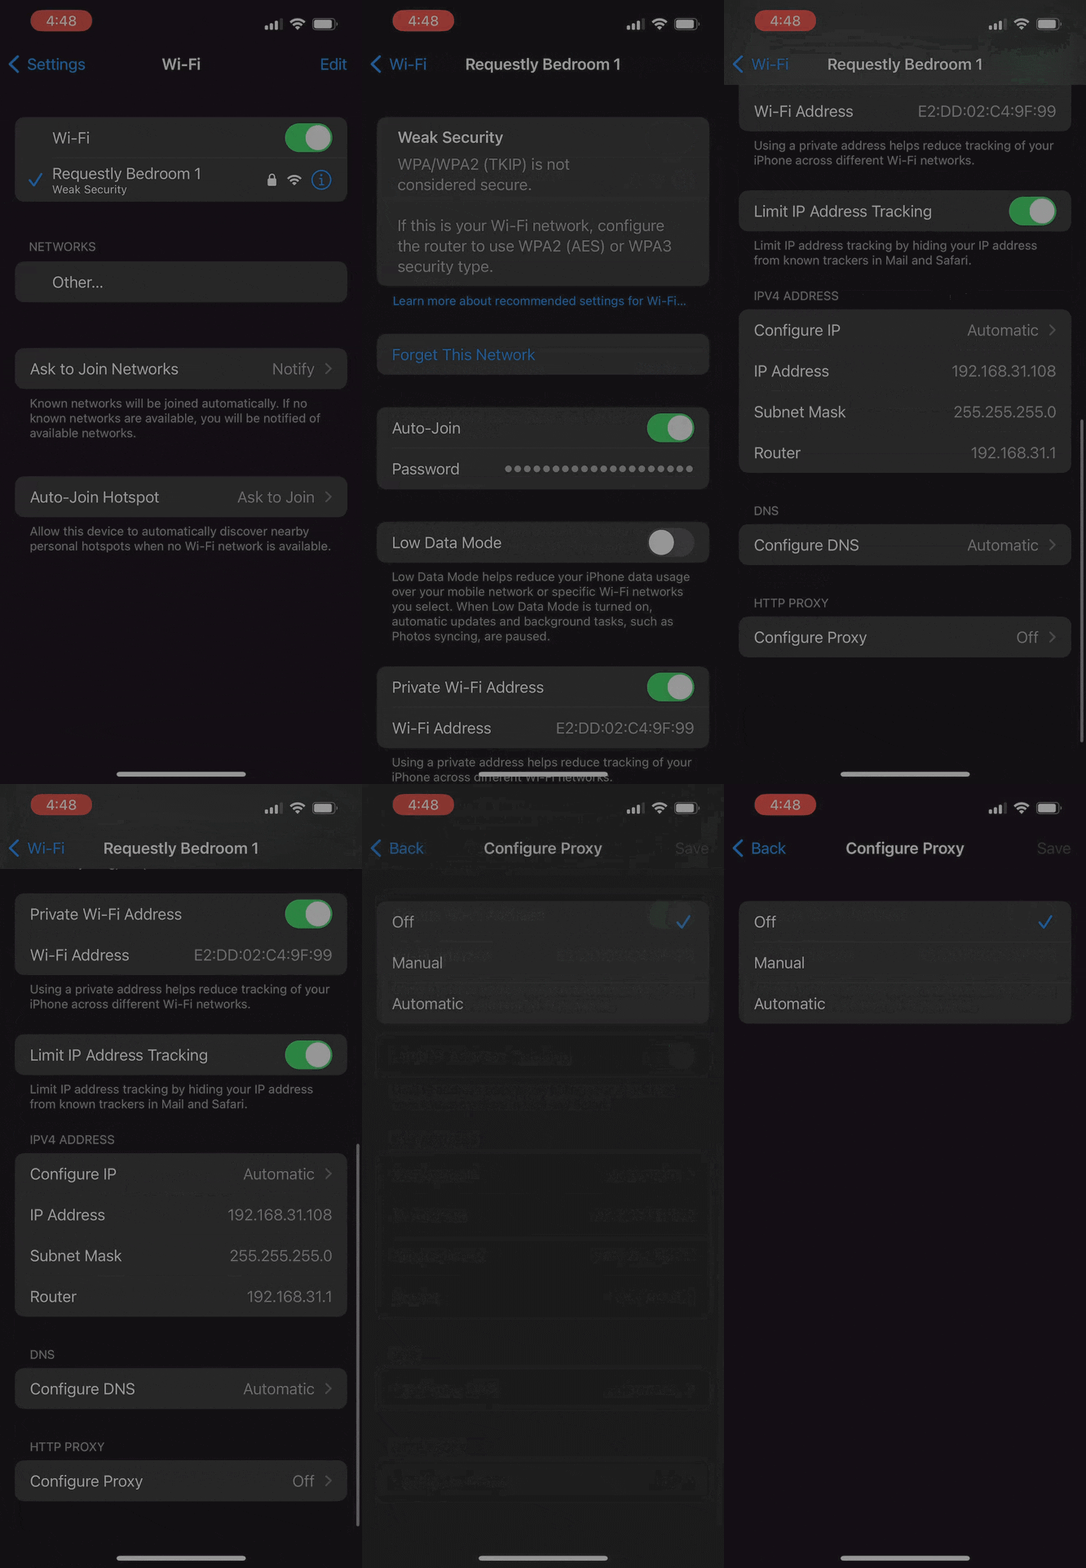
Verify the Proxy Setup
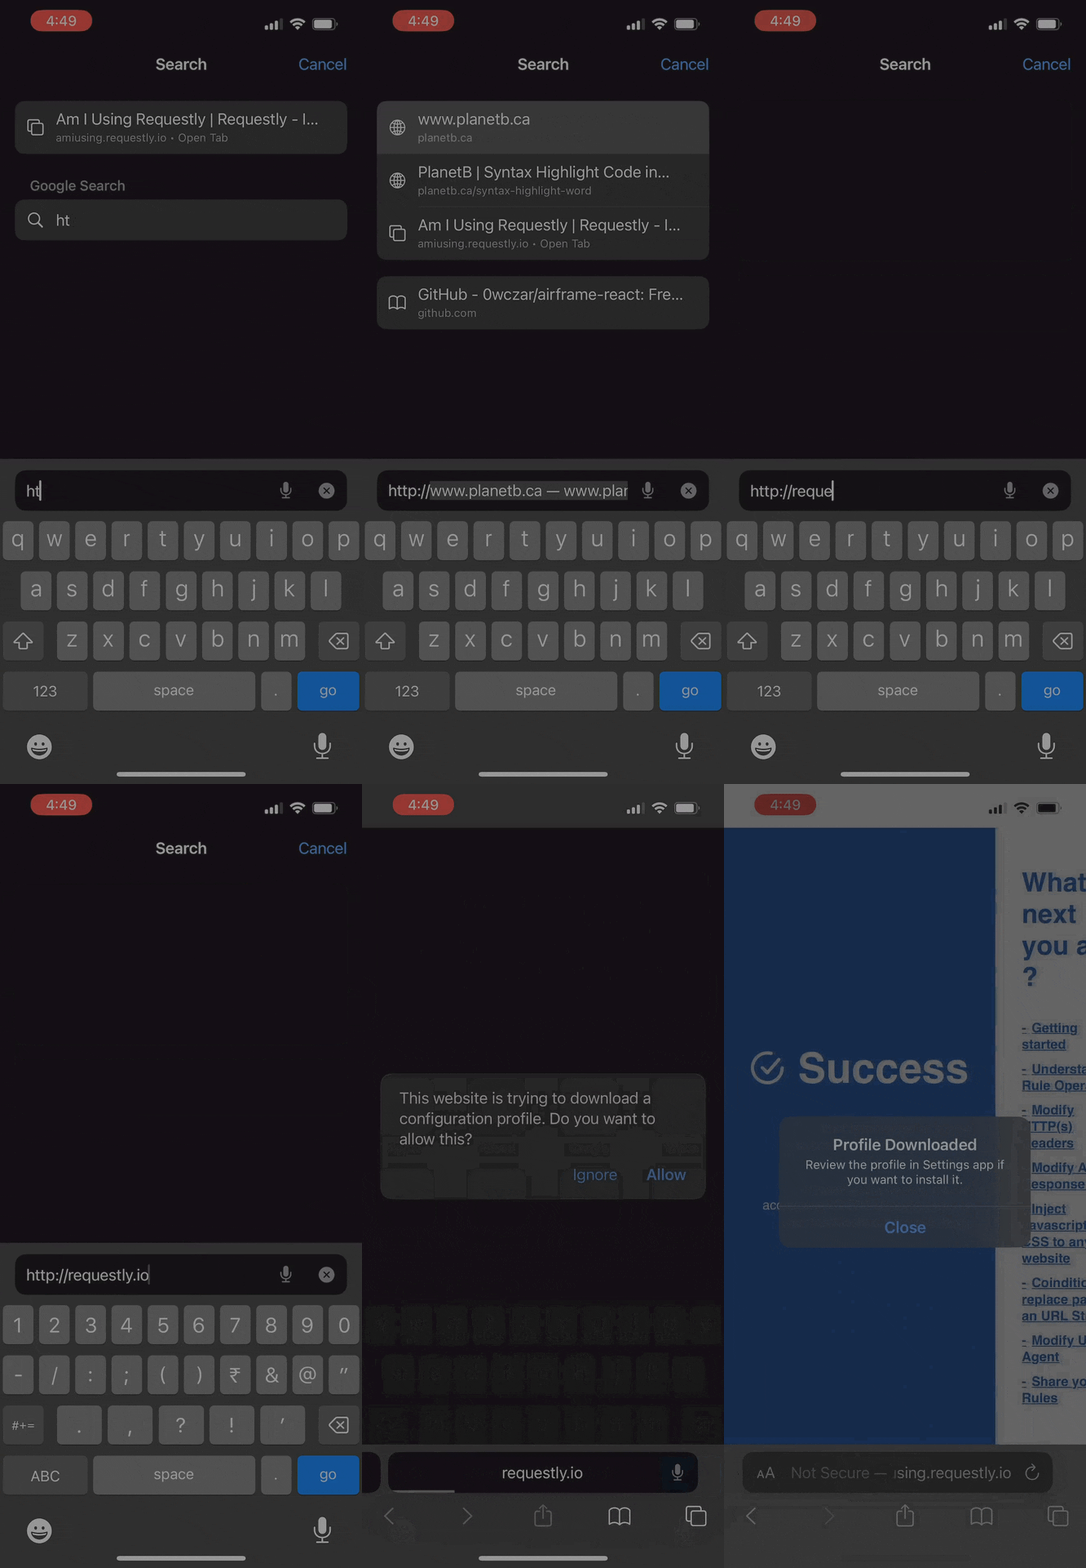
To ensure the proxy is set up correctly, open Safari on your device and visit http://amiusing.requestly.io. If the page loads with a success message, the proxy is successfully configured and ready to intercept network traffic.
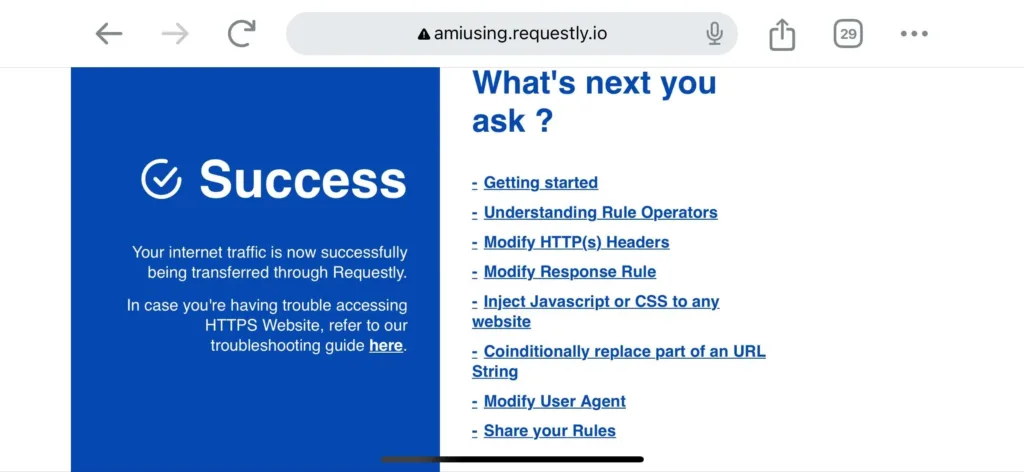
Install CA Certificate
Download the SSL certificate as a custom profile
- Open Safari on your iOS device and navigate to http://requestly.io/ssl (ensure you use HTTP, not HTTPS).
- This will download a custom profile containing the Requestly CA certificate onto your device.
Conclusion
By setting up Requestly with an iOS emulator, you can ease your debugging and development process. Requestly’s ability to intercept, modify, and monitor HTTP traffic allows you to simulate network conditions, debug complex issues, and test API behaviors in a controlled environment. Whether you’re working on improving app performance, handling API failures, or ensuring a smooth user experience, Requestly provides the tools needed to streamline your workflow.
If you’re ready to start testing smarter and shipping faster, download Requestly and integrate it into your iOS development process today.
Contents
Subscribe for latest updates
Share this article
Related posts


