


Get Requestly
Launching a browser is the first step in automating web applications with Selenium. Selenium WebDriver allows you to launch different browsers like Chrome, Firefox, Edge, and others, simulating real user behavior for testing purposes.
This guide walks through the process of launching various browsers using Selenium WebDriver, setting up your environment, and solving common issues that arise during the browser launch process.
Prerequisites for Launching a Browser in Selenium
Before you can start launching browsers with Selenium, there are a few things you need to have in place:
Setting Up Selenium WebDriver
Selenium WebDriver is the main tool used for automating browser interactions. You’ll need to install the WebDriver for the programming language you’re using, such as Java, Python, or C#. WebDriver allows Selenium to communicate directly with the browser.
For Java, you can add the Selenium WebDriver dependency to your pom.xml (Maven) or use Gradle to install it. For Python, you can install it via pip:
pip install seleniumInstalling Browser Drivers
Selenium interacts with browsers via browser-specific drivers, such as chromedriver for Chrome, geckodriver for Firefox, and msedgedriver for Edge. These drivers act as a bridge between the Selenium WebDriver and the browser itself.
You can download the drivers from the following sources:
- Chrome: ChromeDriver
- Firefox: GeckoDriver
- Edge: EdgeDriver
Make sure the driver version matches the browser version to avoid compatibility issues.
Steps to Launch a Browser in Selenium
Once your setup is complete, you can start automating browser launch with Selenium WebDriver. Here’s how you can launch different browsers:
Launching Chrome Browser
To launch the Chrome browser, you need to specify the path of the chromedriver executable. Here’s how you can do it:
import org.openqa.selenium.WebDriver;
import org.openqa.selenium.chrome.ChromeDriver;
public class LaunchChrome {
public static void main(String[] args) {
// Set the path for chromedriver
System.setProperty("webdriver.chrome.driver", "path/to/chromedriver");
// Initialize WebDriver and launch Chrome
WebDriver driver = new ChromeDriver();
driver.get("https://www.example.com");
// Close the browser
driver.quit();
}
}
In this example, the Chrome browser is launched, and the specified URL is opened. Remember to set the correct path for chromedriver.
Launching Firefox Browser
Similarly, for Firefox, you’ll use geckodriver to launch the Firefox browser:
import org.openqa.selenium.WebDriver;
import org.openqa.selenium.firefox.FirefoxDriver;
public class LaunchFirefox {
public static void main(String[] args) {
// Set the path for geckodriver
System.setProperty("webdriver.gecko.driver", "path/to/geckodriver");
// Initialize WebDriver and launch Firefox
WebDriver driver = new FirefoxDriver();
driver.get("https://www.example.com");
// Close the browser
driver.quit();
}
}
Just like with Chrome, the browser launches, and the script opens the specified URL.
Launching Edge Browser
To launch the Microsoft Edge browser, you need to use msedgedriver:
import org.openqa.selenium.WebDriver;
import org.openqa.selenium.edge.EdgeDriver;
public class LaunchEdge {
public static void main(String[] args) {
// Set the path for msedgedriver
System.setProperty("webdriver.edge.driver", "path/to/msedgedriver");
// Initialize WebDriver and launch Edge
WebDriver driver = new EdgeDriver();
driver.get("https://www.example.com");
// Close the browser
driver.quit();
}
}
Edge requires the msedgedriver, which should be set up similarly to the other browser drivers.
Switching Between Browsers
Selenium WebDriver allows you to switch between different browsers within the same test suite. For instance, you might want to test a feature across multiple browsers (cross-browser testing). You can initialize different WebDriver objects for different browsers and run them independently.
WebDriver chromeDriver = new ChromeDriver();
WebDriver firefoxDriver = new FirefoxDriver();
This enables running tests on multiple browsers in parallel, ensuring that your web application is compatible with each of them.
Using WebDriverManager for Browser Drivers
Instead of manually downloading and setting up the browser drivers, you can use WebDriverManager to automate the management of browser drivers. It automatically downloads and configures the appropriate version of the driver for your browser.
Add the following dependency to your Maven pom.xml:
<dependency>
<groupId>io.github.bonigarcia</groupId>
<artifactId>webdrivermanager</artifactId>
<version>4.4.3</version>
</dependency>With WebDriverManager, you can launch a browser like this:import io.github.bonigarcia.wdm.WebDriverManager;
import org.openqa.selenium.WebDriver;
import org.openqa.selenium.chrome.ChromeDriver;
public class LaunchWithWebDriverManager {
public static void main(String[] args) {
WebDriverManager.chromedriver().setup();
WebDriver driver = new ChromeDriver();
driver.get("https://www.example.com");
driver.quit();
}
}
This approach eliminates the need to manually download and update drivers.
Handling Browser Options and Settings
When launching browsers, you may want to set specific preferences or options, such as running the browser in headless mode, disabling notifications, or setting the default window size. Here’s how you can customize browser settings:
Configuring Browser Preferences
For Chrome, you can set various preferences using ChromeOptions:
import org.openqa.selenium.chrome.ChromeDriver;
import org.openqa.selenium.chrome.ChromeOptions;
import org.openqa.selenium.WebDriver;
public class LaunchWithOptions {
public static void main(String[] args) {
ChromeOptions options = new ChromeOptions();
options.addArguments("start-maximized");
// Open browser in maximized mode
WebDriver driver = new ChromeDriver(options);
driver.get("https://www.example.com");
driver.quit();
}
}
Running in Headless Mode
Running a browser in headless mode allows you to perform automation tests without a graphical user interface. This is particularly useful for continuous integration environments.
ChromeOptions options = new ChromeOptions();
options.addArguments("--headless");
// Enable headless mode
WebDriver driver = new ChromeDriver(options);
driver.get("https://www.example.com");
driver.quit();Headless mode is available for most browsers, including Chrome and Firefox.
Common Issues When Launching Browsers and Their Solutions
When launching browsers using Selenium, you may encounter several issues. Below are a few common problems and their solutions:
- Driver Not Found: Ensure the correct path is set for the browser driver, or use WebDriverManager to automatically handle this.
- Browser Version Mismatch: The driver version must match the installed browser version. Always download the latest driver version compatible with your browser.
- Driver Executable Permissions: On some operating systems, the browser driver might not have the necessary permissions to execute. Check the permissions and ensure the driver is executable.
- Headless Mode Issues: Some browser features may not work properly in headless mode. If you experience issues, try running the browser in normal mode to diagnose the problem.
Why Run Browser Tests on Real Devices and Browsers
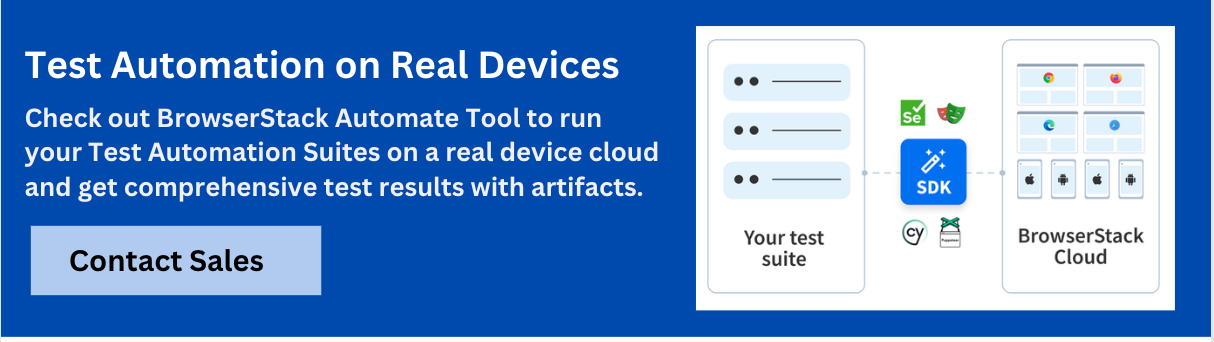
Even though Selenium provides a robust way to launch and automate browsers, testing on real devices and browsers is essential to ensure that your web application behaves as expected under real-world conditions. Local setups or emulators often fail to replicate the behavior of real users, leading to potential bugs that are difficult to detect.
BrowserStack Automate enables you to run Selenium tests on real devices and browsers in the cloud. This ensures that your application is tested on a wide range of real user environments, reducing the likelihood of browser or device-specific issues.
Conclusion
Launching and automating browsers is the foundation of Selenium WebDriver tests. By following the steps outlined in this guide, you can efficiently set up and manage browsers, configure preferences, and run tests on multiple platforms. Whether using Chrome, Firefox, or Edge, understanding how to handle browser drivers, options, and common issues is critical for effective web automation.
To take your testing further, consider running your Selenium tests on real devices and browsers with BrowserStack Automate to ensure comprehensive coverage and accurate results across all environments.


Get Started for Free
Contact us