How to setup Charles proxy

Your lightweight Client for API debugging
No Login Required
Requestly is a web proxy that requires a desktop and desktop browser.
Enter your email below to receive the download link. Give it a try next time you’re on your PC!


Introduction
Charles Proxy is a popular web debugging tool that helps developers and testers view all HTTP/S traffic between their machine and the internet. It’s widely used for troubleshooting, API testing, and monitoring network calls in real-time. In this guide, we’ll walk you through setting up Charles Proxy from scratch, so you can start intercepting network requests in no time.
Afterward we will take a look at a tool that provides similar functionality but with a modern and easy-to-use UI.
Step 1: Download and Install Charles Proxy
- Visit the official website: Head over to the Charles Proxy website and download the appropriate version for your operating system (Windows or macOS).
- Run the installer: Follow the installation wizard prompts. On macOS, you may need to drag the app into the Applications folder. For Windows, follow the standard installation steps.
- Launch Charles Proxy: Once installed, open Charles Proxy. You’ll be greeted with a trial version screen if you haven’t purchased a license.
Step 2: Set Up SSL Proxying
Charles Proxy allows you to inspect HTTPS traffic as well. Here’s how to set it up:
Enabling SSL Proxying in Charles
- Open Charles Proxy.
- Go to the Proxy menu and select SSL Proxying Settings.
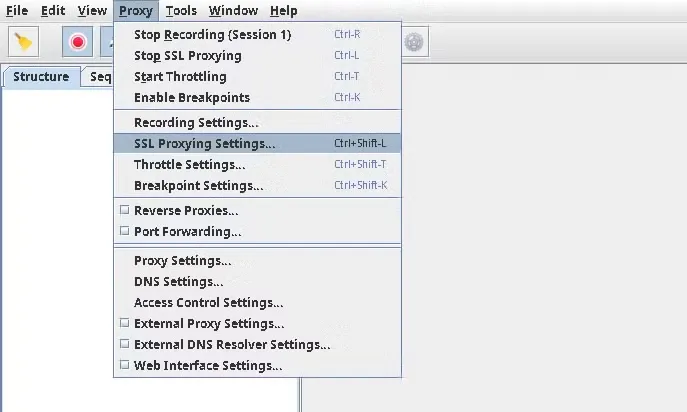
- In the pop-up window, click Add in the Include section to specify the domains you want to decrypt.
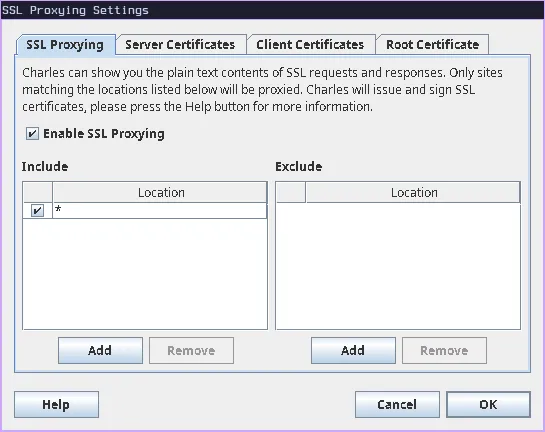
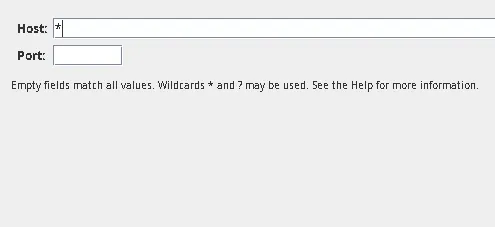
- You can choose to decrypt traffic from all domains (by entering *) or specify certain domains like api.example.com.
- Click OK to save your settings.
Install the Charles Root Certificate
To inspect HTTPS traffic, Charles needs to act as a trusted certificate authority (CA). This requires installing a root certificate on your system or device.
On Windows
Go to Help > SSL Proxying > Install Charles Root Certificate.
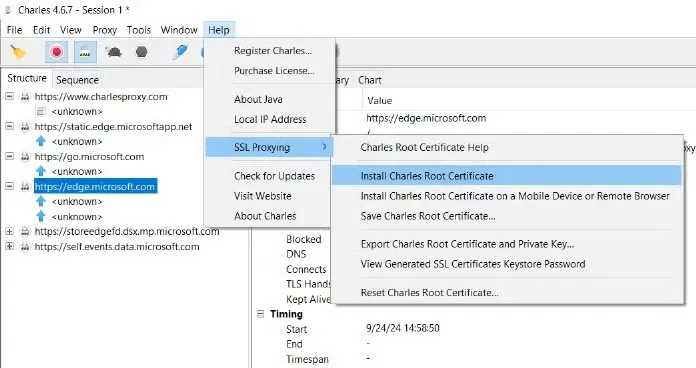
- A certificate installation window will appear here Click “ Install Certificate”
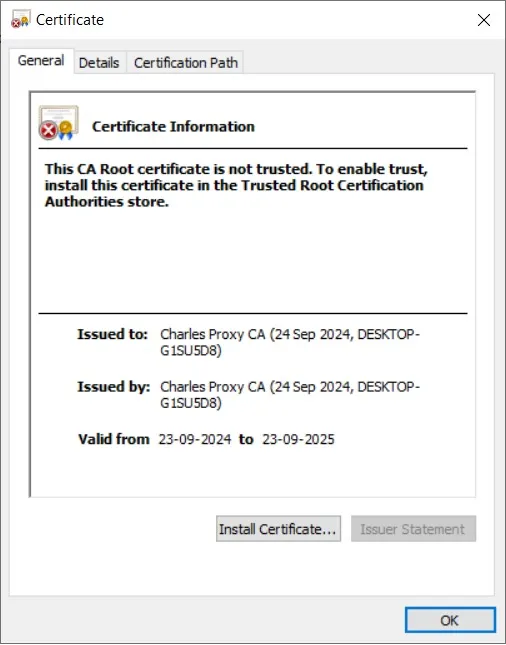
- Now select between “Current User” or “Local Machine” as you prefer.
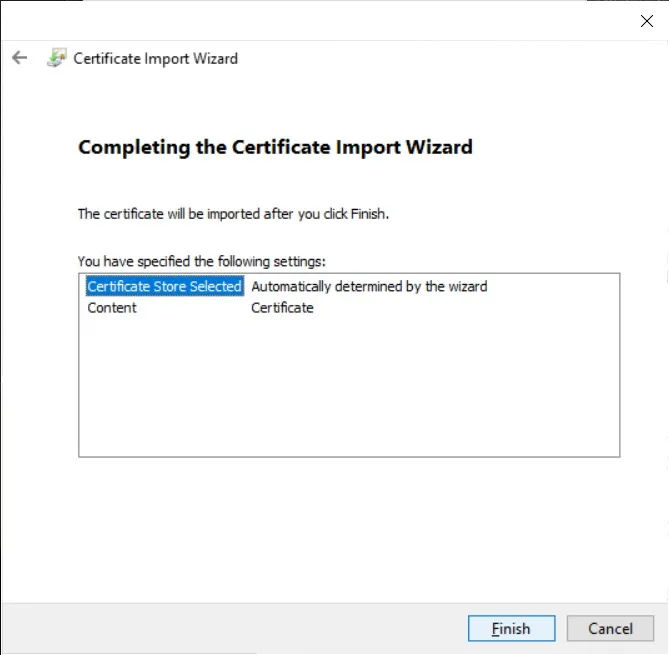
On Mac
Go to Help > SSL Proxying > Install Charles Root Certificate.
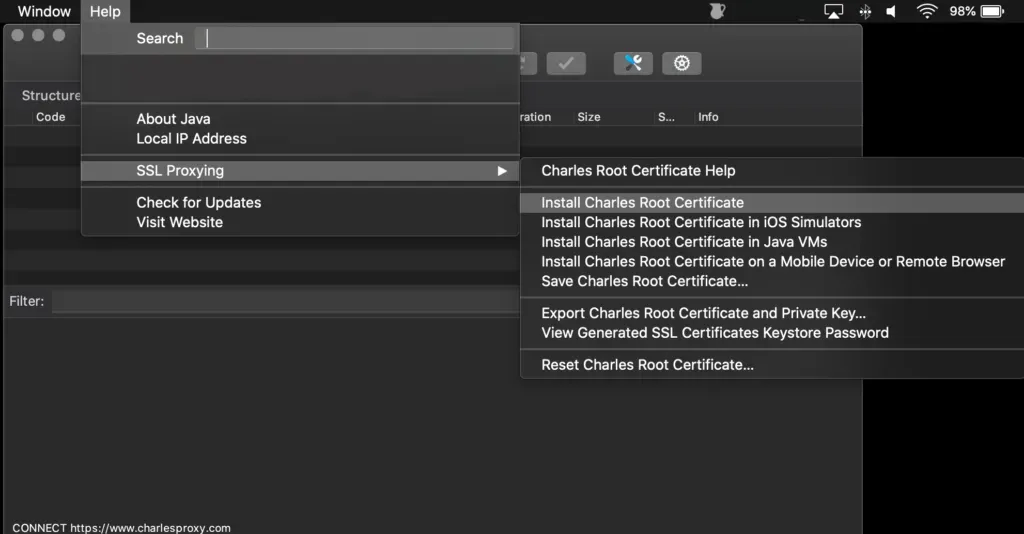
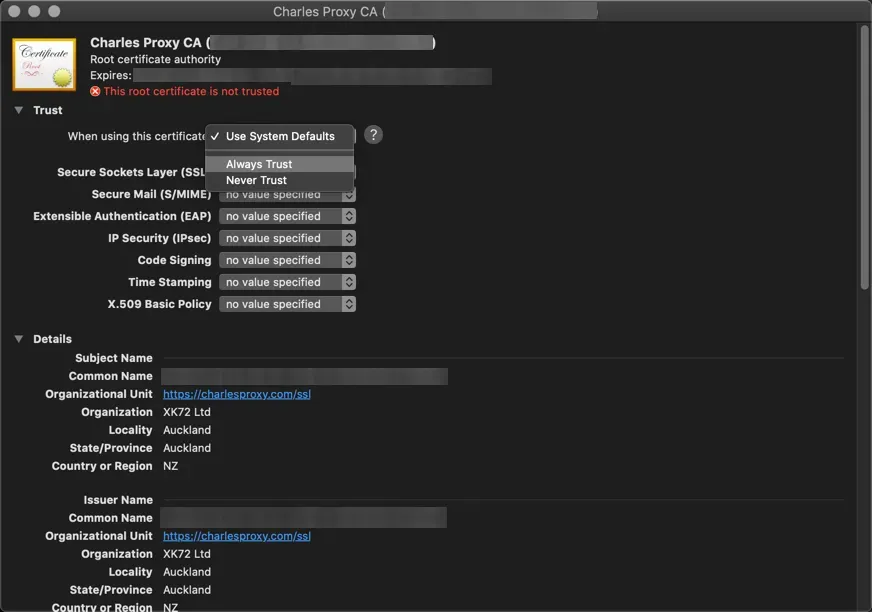
- The Keychain Access window will open up. here select Charles proxy certificate
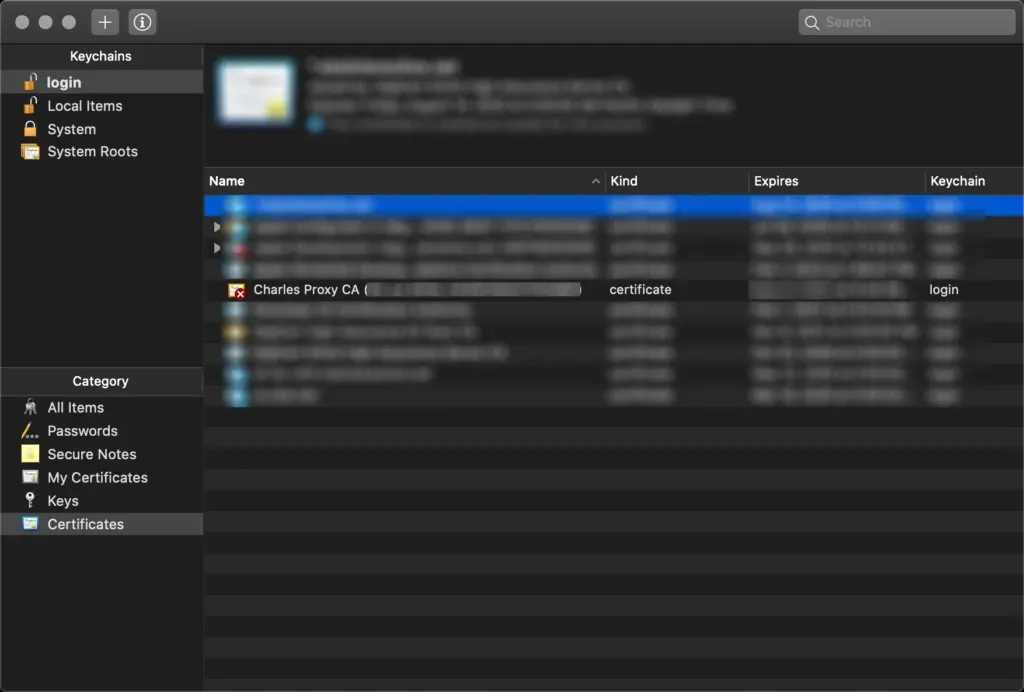
- Now click the “ When using this certificate” dropdown and select “ Always Trust “.
On Linux
Go to Help > SSL Proxying > Install Charles Root Certificate.
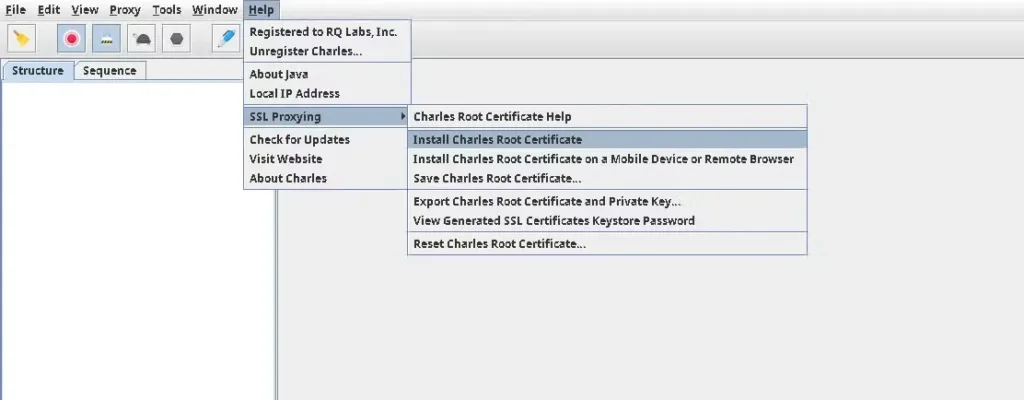
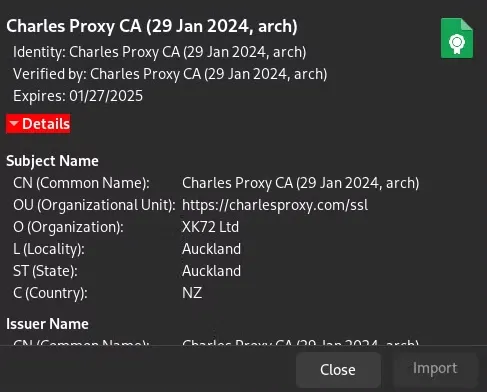
- Your browser will download the certificate. Open the file, and the system will prompt you to install it.
Step 4: Capture Network Traffic
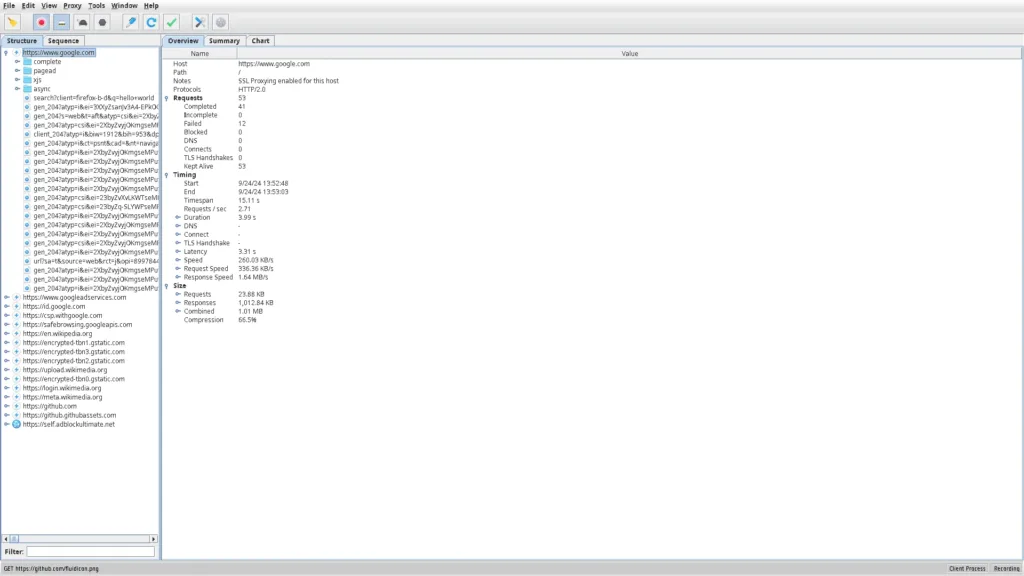
- Start capturing traffic: Once the proxy settings are configured, go back to Charles Proxy, and hit the record button (the red dot) to start capturing requests.
- View traffic: As you browse the web or use apps, you’ll start seeing requests and responses in Charles’s main window. You can filter, inspect, and export this data for debugging purposes.
Requestly: An Easier Alternative to Charles Proxy
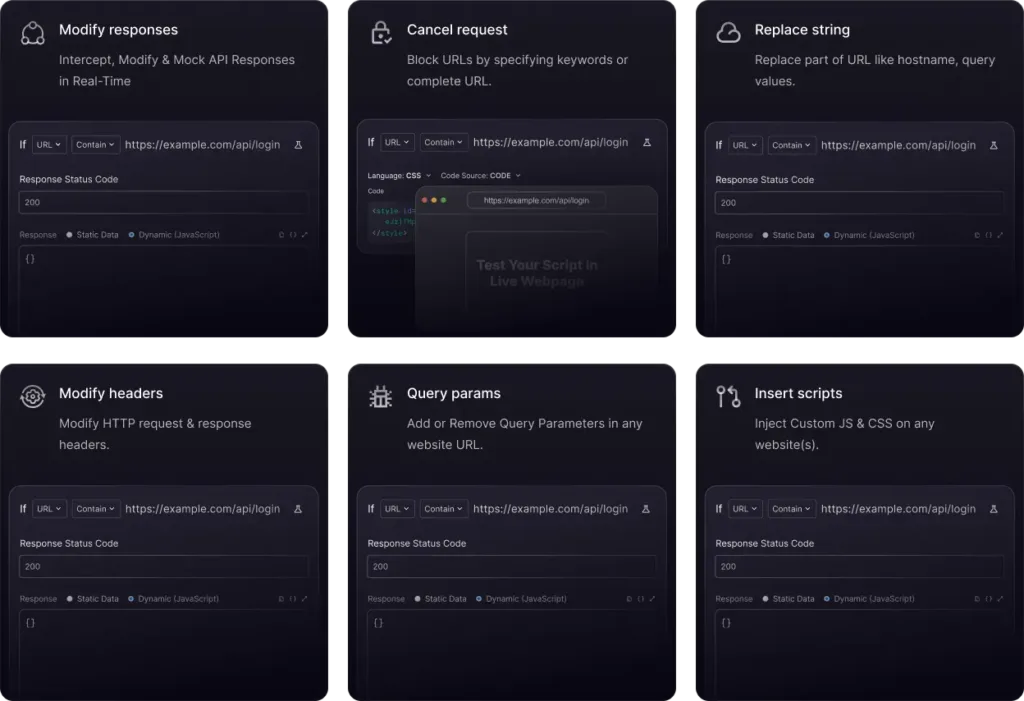
Requestly offers an easier, browser-based alternative for users who find Charles Proxy complex. It provides similar functionality through a more user-friendly interface, making it ideal for quick web traffic modifications without the need for advanced setup. Unlike Charles Proxy, which lacks a Chrome Extension, Requestly offers extensive functionality directly as a browser extension, along with a standalone desktop app for more advanced use cases. For every feature in Charles Proxy, there’s a corresponding tool in Requestly, such as redirecting URLs, modifying headers, and blocking requests.
Check out our other blogs on Charles proxy tools to see the comparison
Conclusion
Setting up Charles Proxy allows you to inspect and debug network traffic in real-time, making it an invaluable tool for developers and testers. By following the steps outlined in this guide, you should be able to set up Charles Proxy and start capturing HTTP/S traffic quickly.
Contents
Subscribe for latest updates
Share this article
Related posts
Get started today
Requestly is a web proxy that requires a desktop and desktop browser.
Enter your email below to receive the download link. Give it a try next time you’re on your PC!


