How to use Requestly with Android Emulator

Your lightweight Client for API debugging
No Login Required
Requestly is a web proxy that requires a desktop and desktop browser.
Enter your email below to receive the download link. Give it a try next time you’re on your PC!


Introduction
Struggling to debug API calls in your Android app? Intercepting and altering network requests on your Android emulator might be like completing a puzzle with missing pieces. Whether it’s changing request headers, simulating problem responses, or switching between development environments, the process can slow down development—especially when you have to rebuild the app after each change.
What if you could intercept and modify network requests in real-time without changing a line of code? That’s exactly what Requestly offers. It allows you to capture, edit, and mock API requests and responses within your Android emulator without any major code change. In this article, we’ll show you how to set up and use Requestly to gain complete control over your network traffic and simplify debugging.
How Requestly Works
Requestly is a powerful proxy that sits between your Android Emulator and the internet. Whenever your app sends a request to a server, that request first routes through Requestly’s proxy. This allows Requestly to intercept your request and then it can log, modify or mock requests and responses, giving you complete control over the network traffic.
Here are some key features of Requestly:
- Intercepting Requests: As soon as your app sends a network request, Requestly captures it. This allows you to see every outgoing API call or resource request.
- Modifying Requests: After intercepting a request, Requestly allows you to make changes before it reaches the server. You can modify things like:
- URLs: Modify the request destination, allowing you to easily switch between environments (development, staging, production).
- Headers: Add, remove, or modify request headers (such as authentication tokens) to test your app’s response under various conditions.
- Query Parameters: Tweak parameters or data being sent, enabling flexible testing without changing the app’s code
Now lets see how you can do this in just a few clicks
Steps to Configure Requestly with Android Emulator
Setting up Requestly with your Android Emulator is a straightforward process. Follow these steps to get everything up and running smoothly:
1. Install Requestly : Download and install requestly’s desktop app.
2. Set Up the Android Emulator
- Open Android Studio: Launch Android Studio and open your project.
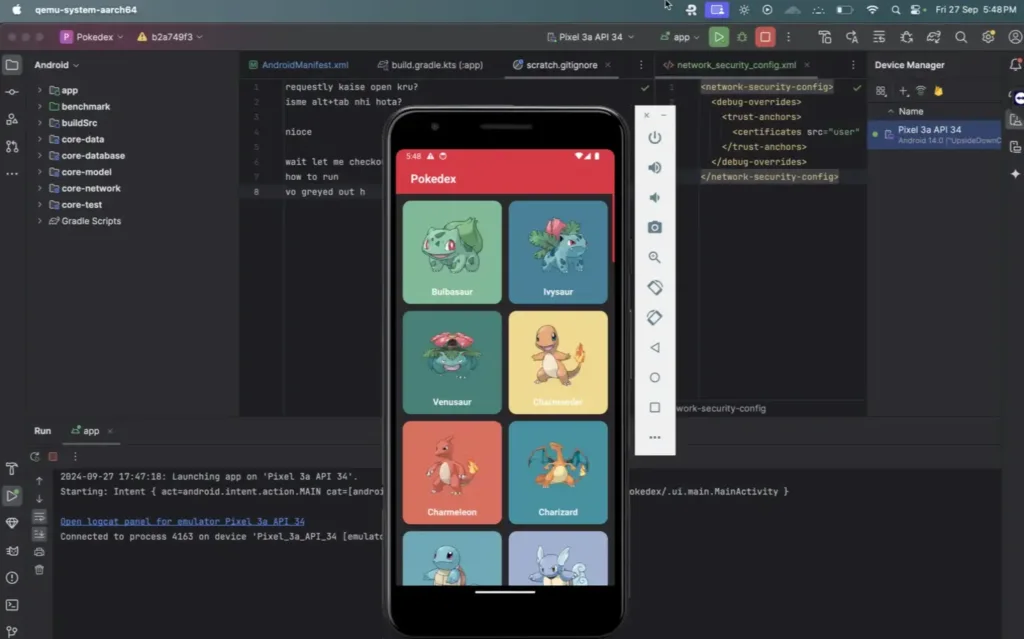
- Start the Emulator: Use android studio to run your app in the emulator.
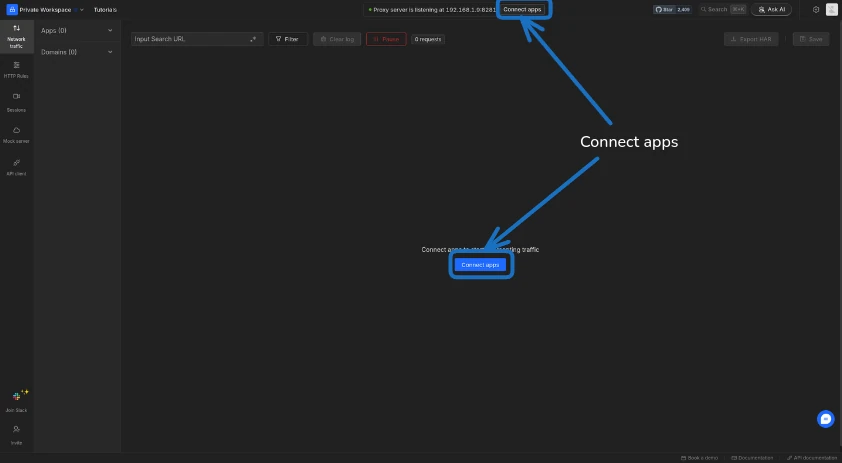
3. Set Up Proxy: Setting up proxy in requestly is very straightforward
- Click on Connect Apps button at top or in the middle
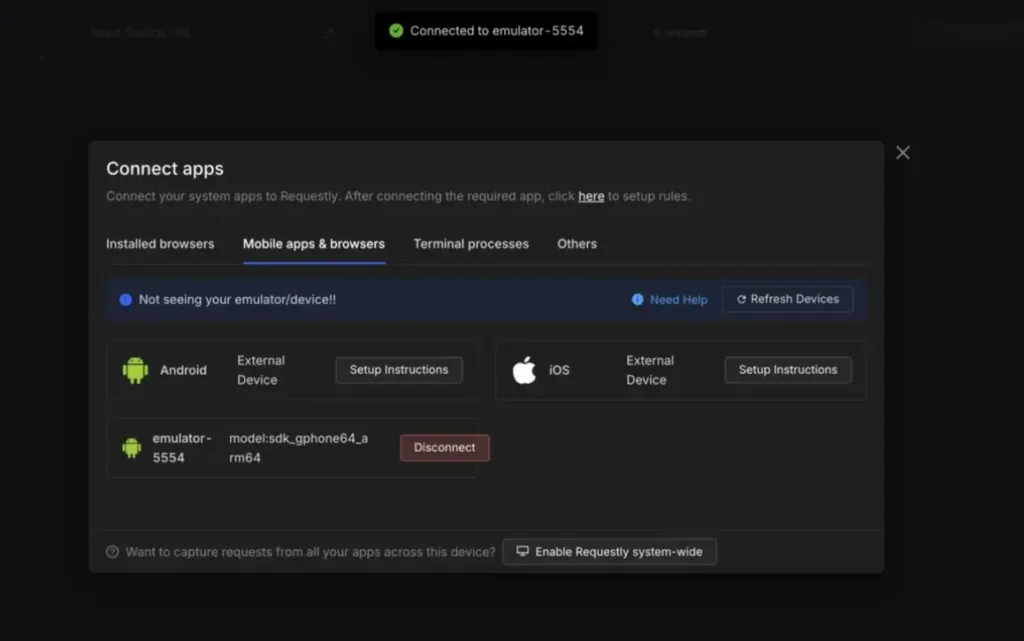
- And you will see the emulator’s name just click connect and your proxy is ready to go
4. Enable SSL Pinning in your App:
To intercept HTTPS traffic, SSL Pinning must be enabled to allow Requestly to read encrypted data. Here’s how to do it:
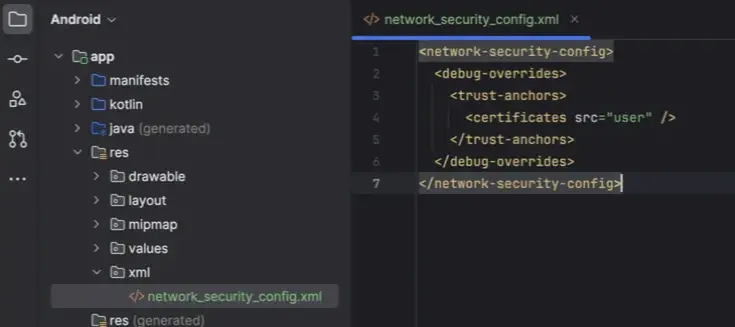
- Edit or create this file
/res/xml/network_security_config.xmland add this code snippet
					<network-security-config>
  <debug-overrides>
    <trust-anchors>
      <certificates src="user" />
    </trust-anchors>
  </debug-overrides>
</network-security-config>
- Now open your
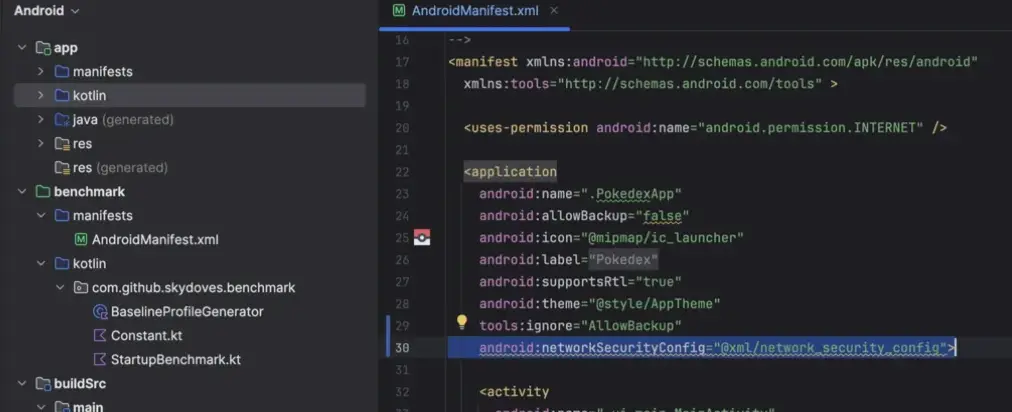
AndroidManifest.xmlfile and add this line in your application tag
android:networkSecurityConfig="@xml/network_security_config"
Common Use Cases for Requestly with Android Emulator
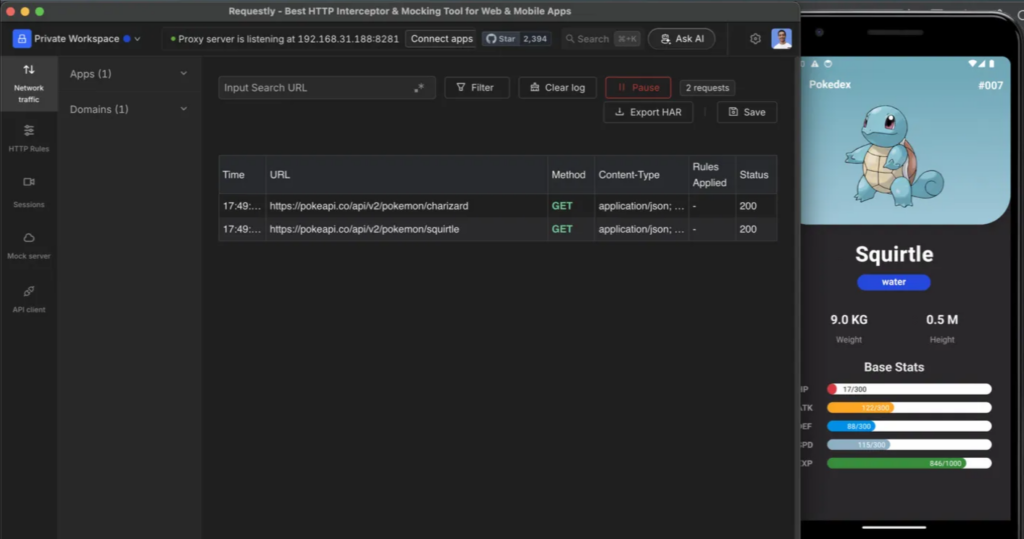
- Inspect Network Traffic: Inspect all outgoing and incoming requests from your app, showing detailed request and response data instantly
- Instantly Switch API Environments: Redirect requests to different environments on the fly. Just set a rule to change API endpoints without touching your code
- Test with Custom Auth Headers: Inject custom headers to simulate different authentication scenarios and user roles with no hassle, speeding up your testing process
Conclusion
Debugging and testing API calls in your Android app doesn’t have to be a cumbersome process that slows down development. Requestly empowers you to take full control of your network traffic with its intuitive features, like intercepting, modifying, and mocking requests in real time—all without altering a single line of code.
From effortlessly switching between API environments to testing custom headers and responses, Requestly simplifies debugging, enhances flexibility, and saves time. With the steps outlined in this article, you can quickly set up Requestly with your Android Emulator and supercharge your app development workflow.
Contents
Subscribe for latest updates
Share this article
Related posts
Get started today
Requestly is a web proxy that requires a desktop and desktop browser.
Enter your email below to receive the download link. Give it a try next time you’re on your PC!


