


Get Requestly
Mouse hover is a common interaction in web applications where hovering over an element triggers a visual change or reveals hidden elements.
Selenium WebDriver provides a way to simulate this interaction, allowing automation testers to verify these UI behaviors.
This article explores how to implement mouse hover in Selenium, the best practices, common challenges, and why it’s important to run these tests on real devices and browsers.
What is Mouse Hover in Web Automation?
Mouse hover refers to the action of moving the mouse cursor over a specific element on a webpage, without clicking it. It’s commonly used in situations where additional information, menus, or hidden actions appear upon hovering. Examples include dropdown menus, tooltips, and dynamic content updates.
In Selenium, mouse hover can be emulated to verify the behavior of these UI elements automatically, making it an essential part of automated UI testing.
Why Mouse Hover is Important in Selenium Testing
Web applications often use mouse hover for interactive elements that must be tested thoroughly. If automated tests don’t account for hover actions, you might miss issues like:
- Hidden elements not displaying properly
- Drop-down menus failing to appear
- UI elements that are responsive only when hovered
- Dynamic content failing to load or display under hover
By simulating hover actions, Selenium allows testers to ensure that web elements respond as expected under real user conditions.
How to Perform Mouse Hover in Selenium
In Selenium, the Actions class is the primary tool for handling complex user interactions such as mouse hover. Here’s how to perform mouse hover in Selenium:
Using Actions Class in Selenium
The Actions class is a powerful utility in Selenium that provides methods to simulate user actions such as mouse movements, key presses, and drag-and-drop.
Here’s how you can use the Actions class to perform a mouse hover:
// Importing necessary Selenium classes
import org.openqa.selenium.By;
import org.openqa.selenium.WebDriver;
import org.openqa.selenium.WebElement;
import org.openqa.selenium.chrome.ChromeDriver;
import org.openqa.selenium.interactions.Actions;
public class MouseHoverExample {
public static void main(String[] args) {
WebDriver driver = new ChromeDriver();
driver.get("http://example.com");
// Locate the element to hover over
WebElement elementToHover = driver.findElement(By.id("hoverElement"));
// Create Actions object
Actions actions = new Actions(driver);
// Perform mouse hover
actions.moveToElement(elementToHover).perform();
driver.quit();
}
}This code launches a browser, navigates to a webpage, locates the element to hover over, and then simulates the hover action using the moveToElement() method.
Using moveToElement() Method
The moveToElement() method of the Actions class is used to move the mouse to the middle of a specific web element. This is the most common method to simulate hover in Selenium.
actions.moveToElement(element).perform();You can also move the mouse by specifying a relative offset from the element:
actions.moveToElement(element, xOffset, yOffset).perform();This moves the mouse to the coordinates (xOffset, yOffset) relative to the top-left corner of the element.
Combining Mouse Hover with Click or Other Actions
In many cases, you may need to perform a click after hovering, or trigger other actions such as drag-and-drop. Selenium’s Actions class allows chaining multiple actions together.
actions.moveToElement(elementToHover)
.click() // Perform a click after hovering
.perform();
Alternatively, you could combine the hover action with key presses or drag-and-drop operations to automate complex workflows.
Handling Dynamic Web Elements During Hover
In modern web applications, elements that respond to hover actions are often dynamically loaded. These elements might not be immediately available when the page loads, leading to synchronization issues in your tests.
To handle such cases, Selenium provides various waiting mechanisms, including Explicit Waits and Fluent Waits. You can wait for the element to become visible or interactable before performing the hover action:
WebDriverWait wait = new WebDriverWait(driver, 10);
WebElement dynamicElement = wait.until(ExpectedConditions.visibilityOfElementLocated(By.id("dynamicElement")));
actions.moveToElement(dynamicElement).perform();
This ensures that the element is available for interaction before Selenium attempts to hover over it.
Common Challenges in Mouse Hover Automation
While mouse hover is straightforward in Selenium, there are a few challenges to watch out for:
- Element Not Visible: If the element is hidden or covered by another element, the hover action will fail. Use explicit waits to ensure the element is visible and interactable.
- Timing Issues: Dynamic content might not load instantly after hover. Use waits or timeouts to give the content time to appear.
- Non-responsive UI: Some web elements may only respond to hover if the mouse is positioned precisely over the element. In such cases, use offsets or test with different browsers.
- Mouse Hover in Complex UI: Complex web UIs (e.g., sliding menus or elements that require multiple hover actions) may require more advanced handling with chained actions.
Best Practices for Reliable Mouse Hover in Selenium
To ensure your Selenium mouse hover actions are stable and reliable, follow these best practices:
- Use Explicit Waits: Always wait for the element to be visible and interactable before performing the hover action. This helps avoid timing issues.
- Avoid Hard-Coding Coordinates: Rely on element locators (like ID, class, or CSS selector) instead of hard-coding mouse positions. This makes your tests more robust and adaptive to layout changes.
- Handle Dynamic Content: For dynamic web elements that appear on hover, ensure the content is fully loaded before interacting with it.
- Test Across Browsers: Test hover actions across different browsers (e.g., Chrome, Firefox, Safari) to ensure consistent behavior. Browser-specific quirks can affect hover actions.
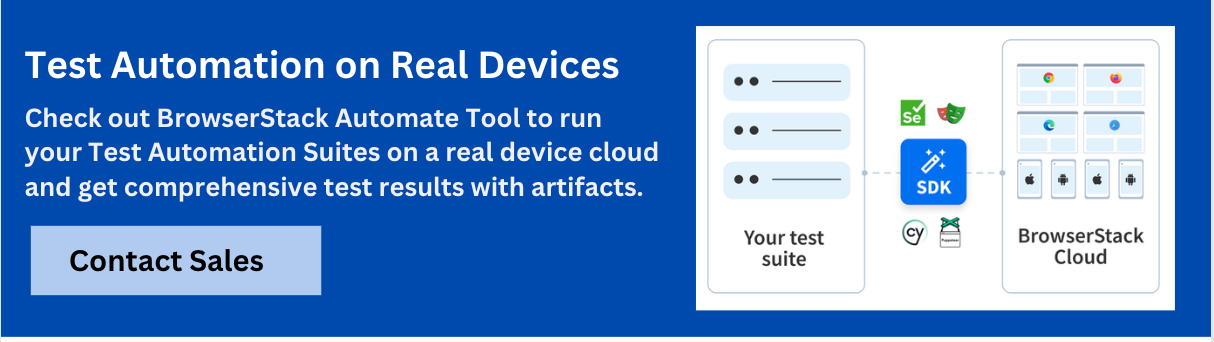
Why Run Mouse Hover Tests on Real Devices and Browsers
Even though Selenium provides excellent tools for emulating mouse hover, testing on real devices and browsers is crucial for ensuring the behavior is consistent across various user environments.
BrowserStack Automate allows you to run your Selenium scripts on real devices and browsers, making it easier to simulate true user interactions. You can test mouse hover actions on thousands of real devices and browser combinations, ensuring your application performs well across all platforms. This minimizes the risk of encountering issues related to browser rendering, device-specific behavior, or UI responsiveness.
Conclusion
Mouse hover is an essential interaction in web automation, and Selenium provides powerful tools to simulate this action using the Actions class. By understanding how to handle mouse hover and overcoming common challenges, you can ensure that your automated tests are comprehensive and reliable. To further enhance your testing strategy, run your Selenium tests on real devices and browsers using BrowserStack Automate, ensuring that your hover actions are validated under real-world conditions.


Get Started for Free
Contact us