Using Requestly for HTTP authorization

Your lightweight Client for API debugging
No Login Required
Requestly is a web proxy that requires a desktop and desktop browser.
Enter your email below to receive the download link. Give it a try next time you’re on your PC!


Authentication is how websites and apps make sure you are who you say you are. It’s what allows users to log in, access their personal data, and use protected features like paid services etc.
In most web apps, Authorization happens through HTTP requests. These requests include headers—small pieces of information sent along with each request. One important job of headers is to carry authentication credentials, like tokens or API keys, so the server knows which user is making the request.
As a developer or tester, you might need to simulate different authentication scenarios:
- Pretend to be a logged-in or logged-out user
- Switch between different user roles (like admin vs regular user)
- Test how your app handles expired or invalid tokens
Instead of changing backend code or modifying frontend logic, you can use tools like Requestly to modify these headers on the fly—directly in your browser. But before we dive into how, let’s take a closer look at how headers are used in authentication.
Authentication and Headers
Common Authentication Headers
| Auth Method | Header Name | Example Value | What It Does |
| Basic Auth | Authorization | Basic dXNlcm5hbWU6cGFzc3dvcmQ= | Sends base64-encoded username and password |
| Bearer Token | Authorization | Bearer eyJhbGciOiJIUzI1NiIsInR5cCI... | Sends a JWT or token for identifying the user |
| API Key | x-api-key | 12345-abcde-67890 | Passes a key that gives access to the API |
| OAuth 2.0 | Authorization | Bearer <access_token> | Sends a token obtained through OAuth login |
| Custom Token | x-auth-token | abcdef123456 | A custom token header used in many web apps |
| Session Cookies | Cookie | session_id=abc123; logged_in=true | Browser sends stored cookies to the server with each request |
| Set-Cookie (server) | Set-Cookie | session_id=abc123; HttpOnly; Secure | Server uses this header to set a cookie in the browser for future requests |
These headers are usually added automatically once a user logs in, but during development or testing, it’s often useful to manually add or modify them. That’s exactly what you can do with Requestly—making it easy to test authentication behaviour without writing extra code.
Testing Authentication with Requestly
Requestly is a powerful tool that helps developers, testers, and QA engineers intercept and modify network requests right in the browser. It’s available as a browser extension and a desktop app, and it offers a wide range of features like modifying headers, redirecting URLs, blocking requests, mocking API responses, and more.
One of the most useful features for testing authentication is its ability to modify HTTP headers—both requests and responses.
How To Modify Auth Headers in Requestly
Requestly lets you create rules that automatically apply to network requests your browser makes. For authentication testing, this means you can:
- Add an authentication header (like
Authorizationorx-api-key) - Modify an existing header (e.g., swap out a token for another user)
- Remove a header (to simulate missing credentials)
These changes happen in real time—no need to update code, rebuild your app, or reconfigure your backend.
Example Use Case: Simulate a Logged-In User
Let’s say your app uses a Bearer token for authentication. You can:
- Download and Install Requestly.
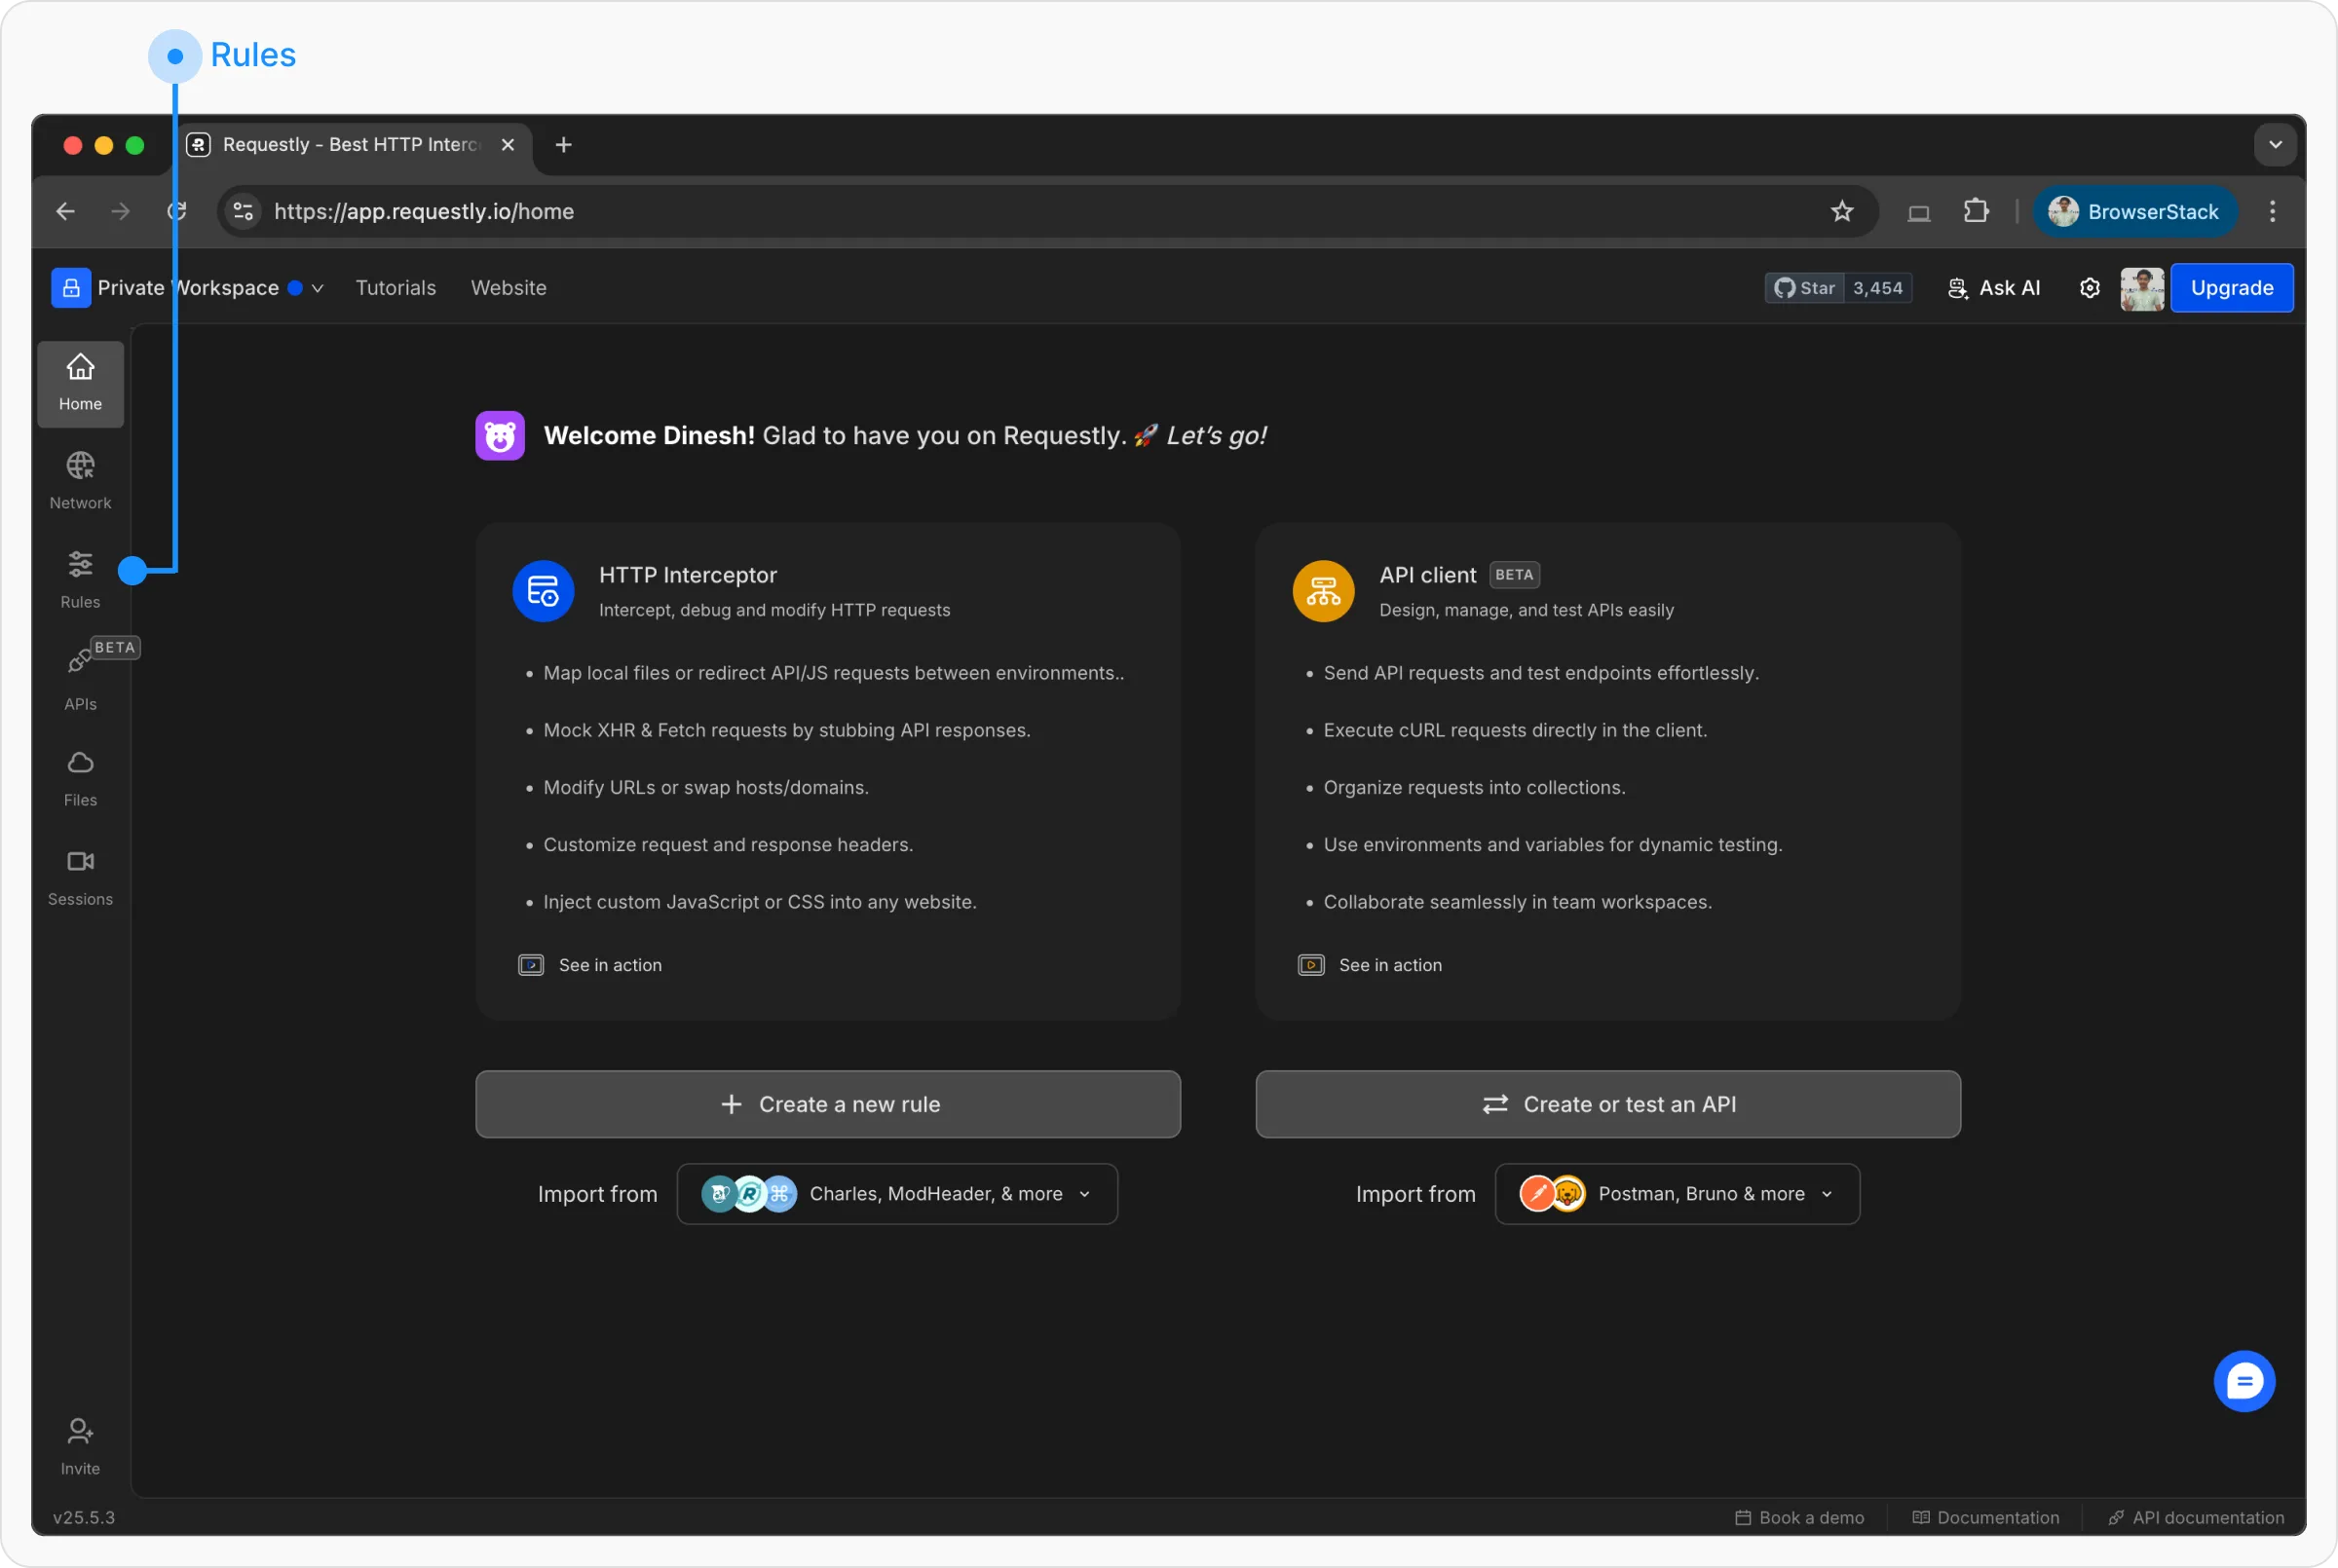
- In the dashboard navigate to Rules
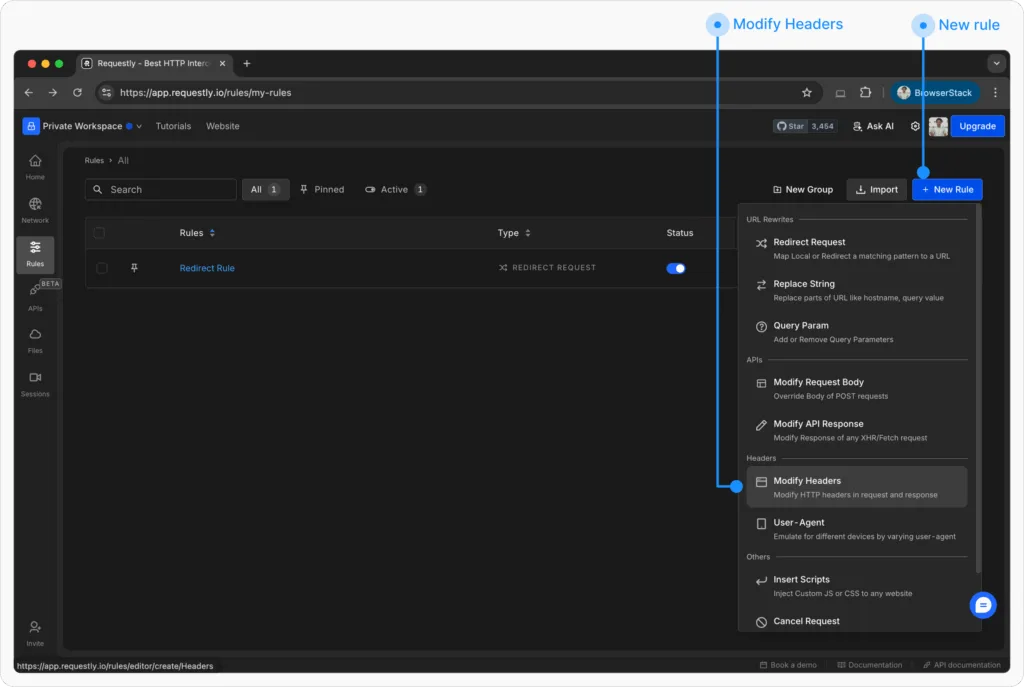
- Here go to Create New Rule → Modify Headers.
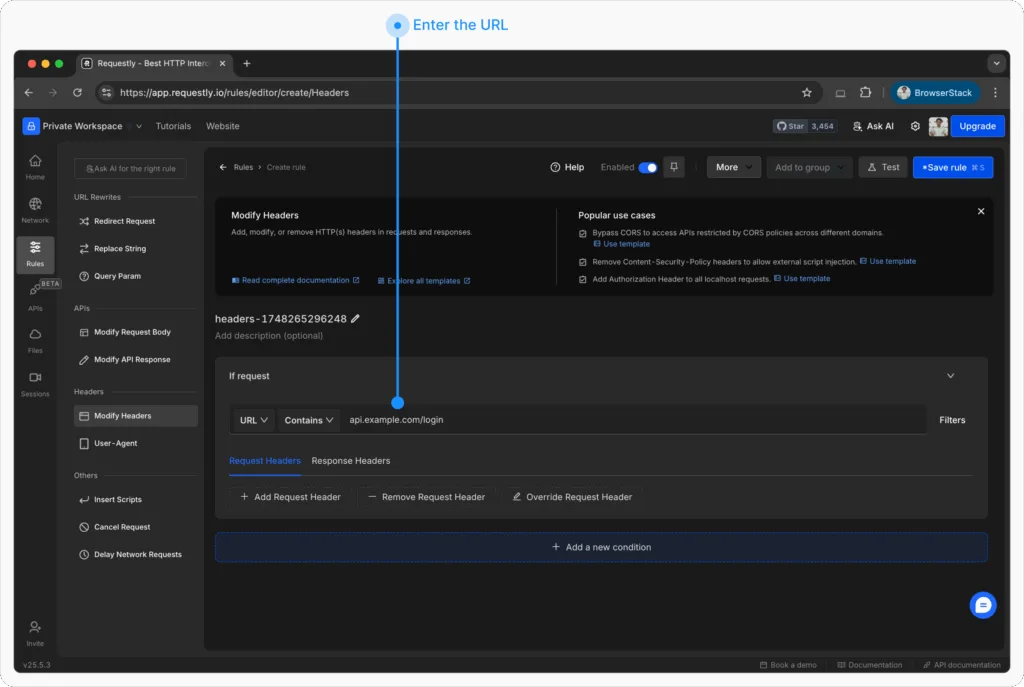
- Enter URL of your backend / auth server.
- Choose Request Headers and add or Override the request header
- Header Name:
Authorization - Header Value:
Bearer your-jwt-token-here
- Header Name:
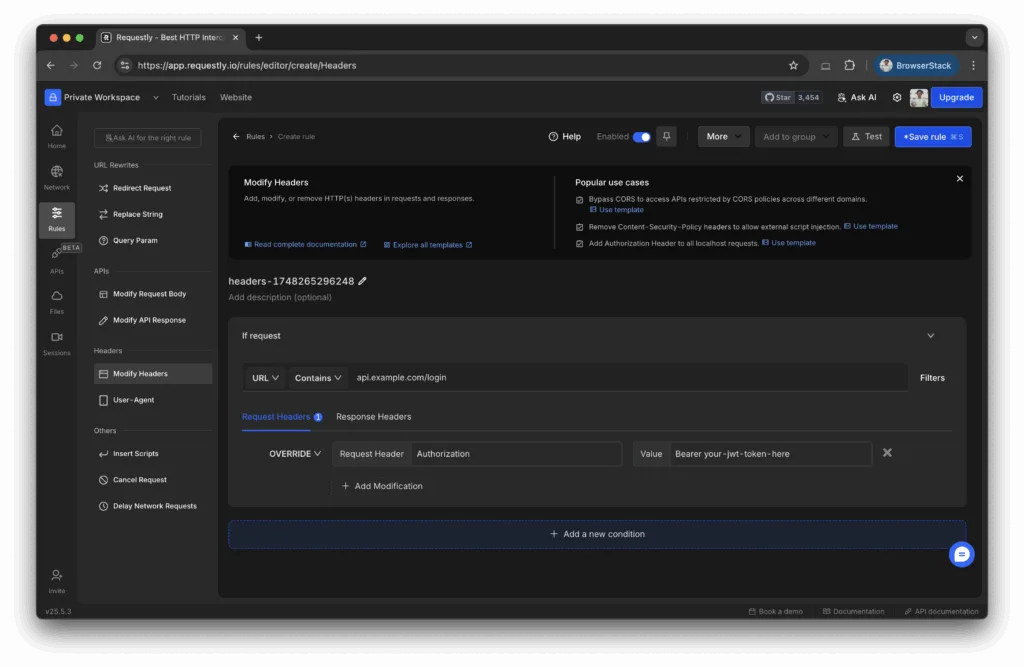
- Apply the rule and refresh your app
Now your app will behave as if a logged-in user is making requests—with no need to go through the login flow every time.
Want to Learn More About HTTP Headers?
Here are some helpful resources to deepen your understanding:
Contents
Subscribe for latest updates
Share this article
Related posts
Get started today
Requestly is a web proxy that requires a desktop and desktop browser.
Enter your email below to receive the download link. Give it a try next time you’re on your PC!


