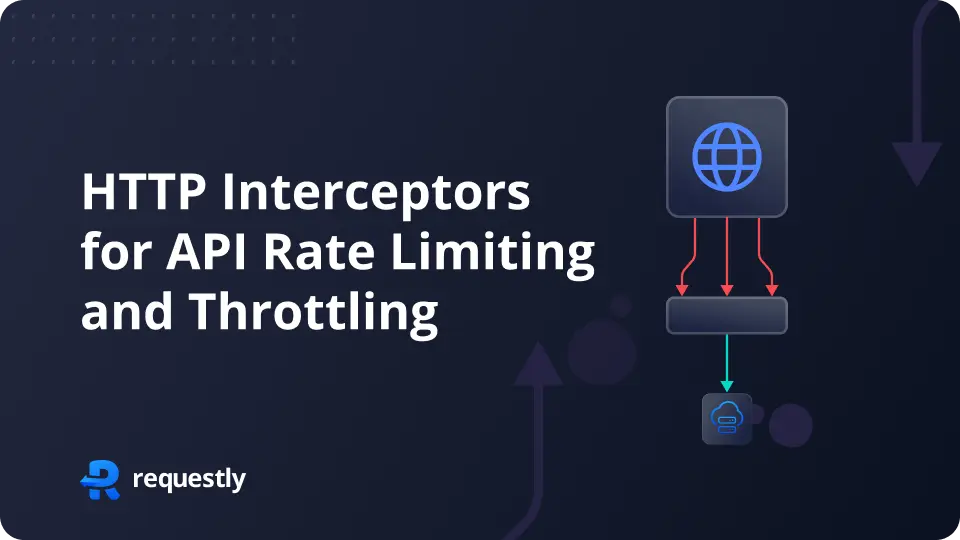
HTTP Interceptors for API Rate Limiting and Throttling
Introduction
Managing API calls efficiently is very crucial for the best user experience. HTTP Interceptors are vital in handling various aspects of HTTP requests and responses, including implementing rate limiting and throttling. In this blog, we will explore how to use HTTP interceptors in Angular and React applications for Rate limiting and Throttling.
API Rate Limiting
API Rate Limiting controls the number of requests a user can send within a specific time frame, such as allowing only 10 requests per minute. This ensures fair usage and prevents overloading the server with excessive requests.
API Throttling
API Throttling manages the rate at which requests are processed to reduce server load. This can be achieved by either delaying or rejecting requests, helping maintain optimal server performance, and preventing potential downtime.
Implementing API Rate Limiting with HTTP Interceptors
API Rate Limiting using Angular Interceptor
- Create a New Angular Project: Use Angular CLI to set up a new project.
					ng new ProjectName
cd ProjectName
- Generate the Interceptor: Use Angular CLI to generate an interceptor.
ng generate interceptor RateLimiter
- Implement the Logic Open
RateLimiter.interceptor.tsand add the logic for your interceptor. Here’s an example that logs a message
					import { HttpInterceptorFn } from '@angular/common/http';
import { throwError, catchError } from 'rxjs';

const requests: Map<string, number[]> = new Map();

export const RateLimiting: HttpInterceptorFn = (req, next) => {
  const RATE_LIMIT_INTERVAL = 60000;
  const REQUEST_LIMIT = 5;

  const currentTime = Date.now();
  const requestKey = `${req.method}:${req.urlWithParams}`;

  if (!requests.has(requestKey)) {
    requests.set(requestKey, []);
    console.log(requests)
  }

  const timestamps = requests.get(requestKey);
  if (timestamps) {
    while (
      timestamps.length > 0 &&
      currentTime - timestamps[0] > RATE_LIMIT_INTERVAL
    ) {
      timestamps.shift();
    }

    if (timestamps.length >= REQUEST_LIMIT) {
      return throwError(() => new Error('Rate limit exceeded'));
    }

    timestamps.push(currentTime);
  }

  return next(req).pipe(
    catchError((err) => {
      requests.delete(requestKey);
      return throwError(() => err);
    })
  );
};
- Registering the Interceptor
To use the interceptor, openapp.config.tsand add it to the providers array:
					...
import { provideHttpClient,withInterceptors } from '@angular/common/http';
import { RateLimiter } from './interceptors/RateLimiting.interceptor';


export const appConfig: ApplicationConfig = {
  providers: [
    ....
    provideHttpClient(
      withInterceptors([RateLimiter])
    ),
  ],
};
- Using Interceptor in your component
Example usage in a Angular (
app.component.ts):
					import { Component } from '@angular/core';
import { HttpClient } from '@angular/common/http';
import { RouterOutlet } from '@angular/router';

@Component({
  selector: 'app-root',
  standalone: true,
  imports: [RouterOutlet],
  template: `
    <h1>Angular Rate Limiting </h1>
    <button (click)="getData()">Click</button>
    <p>Title : {{ data.title }}</p>
    <p>id : {{ data.id }}</p>
  `,
  styleUrl: './app.component.css',
})
export class AppComponent {
  private apiUrl = 'https://jsonplaceholder.typicode.com/todos/1';
  title = 'InterceptorPractice';
  data: any = {};
  constructor(private http: HttpClient) {}
  getData() {
    this.http.get(this.apiUrl).subscribe((res) => {
      this.data = res;
      console.log(res)
    });
  }
}
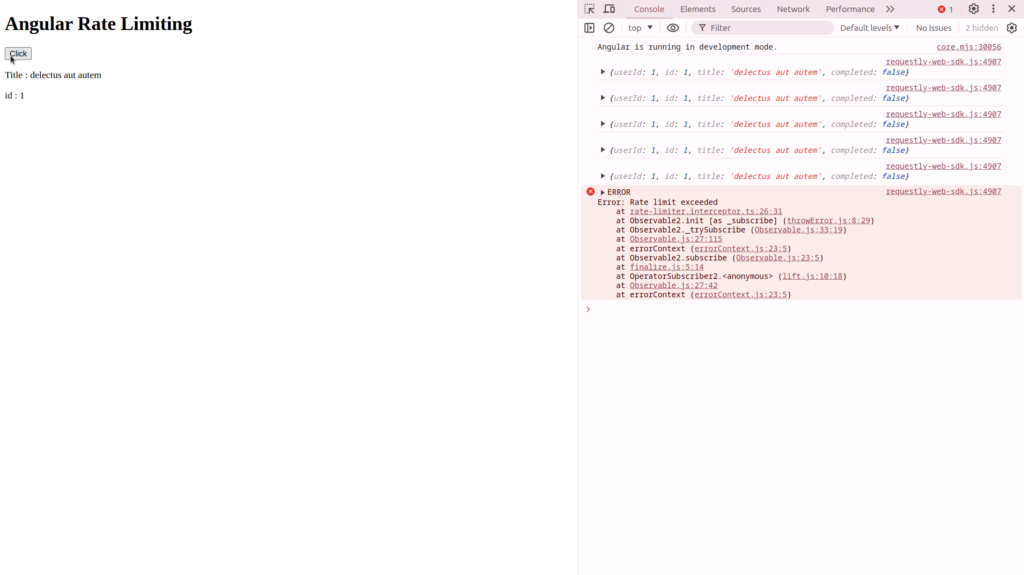
Here, when we click the button to fetch data, the interceptor responds with rate limit exceeded after five requests
API Rate Limiting in React using Axios Interceptor
Create a New React Project
If you don’t already have a React project set up, you can create one using Vite
npm create vite@latest
Install Axios
Install Axios if it’s not already installed in your project
npm install axios
Create a Custom Axios Instance
Create a new file
axiosInstance.js(or any name you prefer) in thesrcdirectory to define your custom Axios instance with rate limiting logic.
					import axios from 'axios';

const RATE_LIMIT_INTERVAL = 60000;
const REQUEST_LIMIT = 5;

const requestTimestamps: number[] = [];

const axiosInstance = axios.create()
axiosInstance.interceptors.request.use(request => {
  const currentTime = Date.now();

  const recentTimestamps = requestTimestamps.filter(timestamp => currentTime - timestamp < RATE_LIMIT_INTERVAL);

  if (recentTimestamps.length >= REQUEST_LIMIT) {
    return Promise.reject(new Error('Rate limit exceeded'));
  }

  recentTimestamps.push(currentTime);

  requestTimestamps.length = 0;
  requestTimestamps.push(...recentTimestamps);

  return request;
}, error => {
  return Promise.reject(error);
});

export default axiosInstance;
Using the Custom Axios Instance in Your Components
Now, you can use the custom Axios instance (
axiosInstance) in your React components wherever you need to make API requests. Replace the defaultaxiosimport withaxiosInstance.Example usage in a React component (
App.js):
					import { useState } from 'react';
import './App.css'
import axiosInstance from './axiosconfig';

function App() {
  const [data, setData] = useState({
    title: "",
    id: ""
  });

  const fetchData = async () => {
    try {
      const response = await axiosInstance.get('https://jsonplaceholder.typicode.com/todos/1');
      setData(response.data);
      console.log(response.data)
    } catch (err) {
      console.error(err)
    }
  };

  return (
    <div className="App">
      <div className='box'>
        <h1>React Rate Limiter</h1>
        <p>Title:{data.title}</p>
        <p>Id   :{data.id}</p>
        <button onClick={fetchData}>Click</button>
      </div>
    </div>
  );
}

export default App;
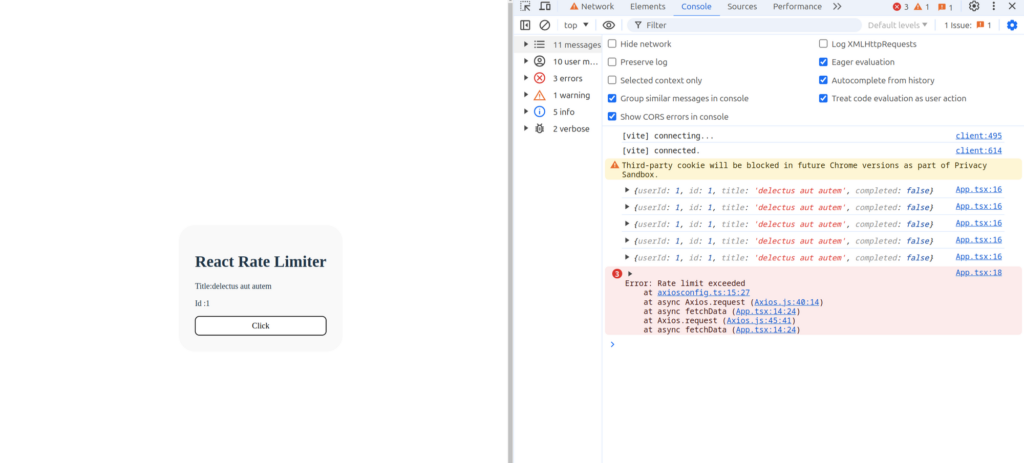
Here, when we click the button to fetch data, the interceptor responds with rate limit exceeded after five requests.
Implementing API Throttling with HTTP Interceptors
API Throttling with Angular Interceptor
- Create a New Angular Project: Use Angular CLI to set up a new project.
					ng new ProjectName
cd ProjectName
- Generate the Interceptor: Use Angular CLI to generate an interceptor.
ng generate interceptor Throttling
- Implement the Logic Open
Throttling.interceptor.tsand add the logic for your interceptor.
					import { HttpInterceptorFn } from '@angular/common/http';
import { of, delay, mergeMap } from 'rxjs';

const THROTTLE_TIME = 2000;
let lastRequestTime = 0;

export const throttlingInterceptor: HttpInterceptorFn = (req, next) => {
  const currentTime = Date.now();
  const calculatedTime = currentTime - lastRequestTime;

  if (calculatedTime < THROTTLE_TIME) {
    const waitTime = THROTTLE_TIME - calculatedTime;
    return of(null).pipe(
      delay(waitTime),
      mergeMap(() => {
        lastRequestTime = Date.now();
        return next(req);
      })
    );
  } else {
    lastRequestTime = Date.now();
    return next(req);
  }
};
- Registering the Interceptor
To use the interceptor, openapp.config.tsand add it to the providers array:
					...
import { provideHttpClient,withInterceptors } from '@angular/common/http';
import { Throttling } from './interceptors/Throttling.interceptor';


export const appConfig: ApplicationConfig = {
  providers: [
    ....
    provideHttpClient(
      withInterceptors([Throttling])
    ),
  ],
};
Using Interceptor in your component
Example usage in a Angular (
app.component.ts):
					import { Component } from '@angular/core';
import { HttpClient } from '@angular/common/http';
import { RouterOutlet } from '@angular/router';
import { ReactiveFormsModule, FormControl, FormGroup } from '@angular/forms';

@Component({
  selector: 'app-root',
  standalone: true,
  imports: [RouterOutlet, ReactiveFormsModule],
  template: `
    <div class="App">
      <div class="box">
        <h1>React API Throttling</h1>
        <h2>Meal</h2>
        <input type="text" [formControl]="searchControl" />
        <hr />
        <div>Meal Name: {{ data.meals && data.meals[0].strMeal }}</div>
        <div>Meal Category: {{ data.meals && data.meals[0].strCategory }}</div>
      </div>
    </div>
  `,
  styleUrl: './app.component.css',
})
export class AppComponent {
  private apiUrl = 'https://www.themealdb.com/api/json/v1/1/search.php?s=';
  data: any = {};
  searchControl = new FormControl('');

  constructor(private http: HttpClient) {
    this.searchControl.valueChanges.subscribe((query) => {
      if (!query) return;
      this.getData(query);
    });
  }
  getData(query: string) {
    this.http.get(`${this.apiUrl}${query}`).subscribe((res) => {
      this.data = res;
      console.log(res);
    });
  }
}
API Throttling in React using Axios Interceptor
Create a New React Project
If you don’t already have a React project set up, you can create one using Vite.
npm create vite@latest
Install Axios
Install Axios if it’s not already installed in your project
npm install axios
Create a Custom Axios Instance
Create a new file
axiosInstance.js(or any name you prefer) in thesrcdirectory to define your custom Axios instance with Throttling logic.
					import axios from 'axios';

const axiosInstance = axios.create();

const THROTTLE_TIME = 2000;

let lastRequestTime = 0;

axiosInstance.interceptors.request.use(config => {
  const currentTime = Date.now();
  const calculatedTime = currentTime - lastRequestTime;
  if (calculatedTime < THROTTLE_TIME) {
    return new Promise(resolve => {
      setTimeout(() => resolve(config), THROTTLE_TIME - calculatedTime);
    });
  }

  lastRequestTime = currentTime;
  return config;
});

export default axiosInstance;
Using the Custom Axios Instance in Your Components
Now, you can use the custom Axios instance (
axiosInstance) in your React components wherever you need to make API requests. Replace the defaultaxiosimport withaxiosInstance.Example usage in a React component (
App.js):
					import { useState } from 'react';
import './App.css';
import axiosInstance from './axiosconfig';

function App() {
  const [data, setData] = useState({
    title: "",
    id: ""
  });
  const [inputValue, setInputValue] = useState("");

  const handleChange = (event) => {
    setInputValue(event.target.value);
    fetchData(event.target.value)
  };

  const fetchData = async (value) => {
    try {
      const response = await axiosInstance.get(`https://www.themealdb.com/api/json/v1/1/search.php?s=${value}`);
      setData(response.data);
      console.log(response.data.meals[0].strMeal);
    } catch (err) {
      console.error(err);
    }
  };

  return (
    <div className="App">
      <div className="box">
        <h1>React API Throttling</h1>
        <h2> Meal</h2>
        <input type="text" onChange={handleChange} value={inputValue} />
        <hr />
        <div>Meal Name: {data.meals && data.meals[0].strMeal}</div>
        <div>Meal Category: {data.meals && data.meals[0].strCategory}</div>
      </div>
    </div>
  );
}

export default App;
External Implementation from Browser Extensions
Overview of Browser Extensions for API Management
Browser extensions can provide an external way to manage API rate limiting and throttling without modifying the application code. This is particularly useful for testing and debugging.
Popular Extensions for API Rate Limiting and Throttling
- Requestly
- ModHeader
- Postman Interceptor
Detailed Guide on Requestly
Overview and Features: Requestly allows you to modify HTTP requests and responses, enabling rate limiting, throttling, and more.
Step-by-Step Guide to Setting Up Requestly:
- Install Requestly
- Create a New Rule: Set up a Delay or Block rule.
- Configure the Rule: Define conditions based on URLs, methods, etc.
- Activate and Test: Enable the rule and observe the changes in network activity.
For more advanced usage, refer to the Requestly documentation
Conclusion
HTTP interceptors are powerful tools for implementing rate limiting and throttling in Angular and React applications. They help manage API calls efficiently, ensuring a balanced load on servers and enhancing user experience.
References
Contents
- Introduction
- API Rate Limiting
- API Throttling
- Implementing API Rate Limiting with HTTP Interceptors
- API Rate Limiting using Angular Interceptor
- Angular Rate Limiting
- API Rate Limiting in React using Axios Interceptor
- React Rate Limiter
- Implementing API Throttling with HTTP Interceptors
- API Throttling with Angular Interceptor
- React API Throttling
- Meal
- API Throttling in React using Axios Interceptor
- React API Throttling
- Meal
- External Implementation from Browser Extensions
- Detailed Guide on Requestly
- Conclusion
- References
Subscribe for latest updates
Share this article
Related posts


